This section documents the group characterization of the laser cutting machines available in our FabLab. As part of the Week 3 group assignment, we focused on understanding safe operation, workflow differences, and fabrication limits across multiple laser systems by performing systematic tests.
For each laser machine, we first completed lab-specific safety training covering ventilation, emergency procedures, and supervision rules. We then characterized the machines by testing focus behavior, power and speed combinations, and effective cutting rate. Using standardized test geometries, we measured kerf values and evaluated joint clearance through press-fit assemblies. Finally, we analyzed which joint types are most suitable for each machine based on cut quality, precision, and repeatability.
Although all laser machines rely on similar principles, differences in optics, focusing mechanisms, software, and workflow significantly affect fabrication results. Documenting these differences allows us to select appropriate machines and parameters for parametric design, press-fit construction, and engraving tasks.
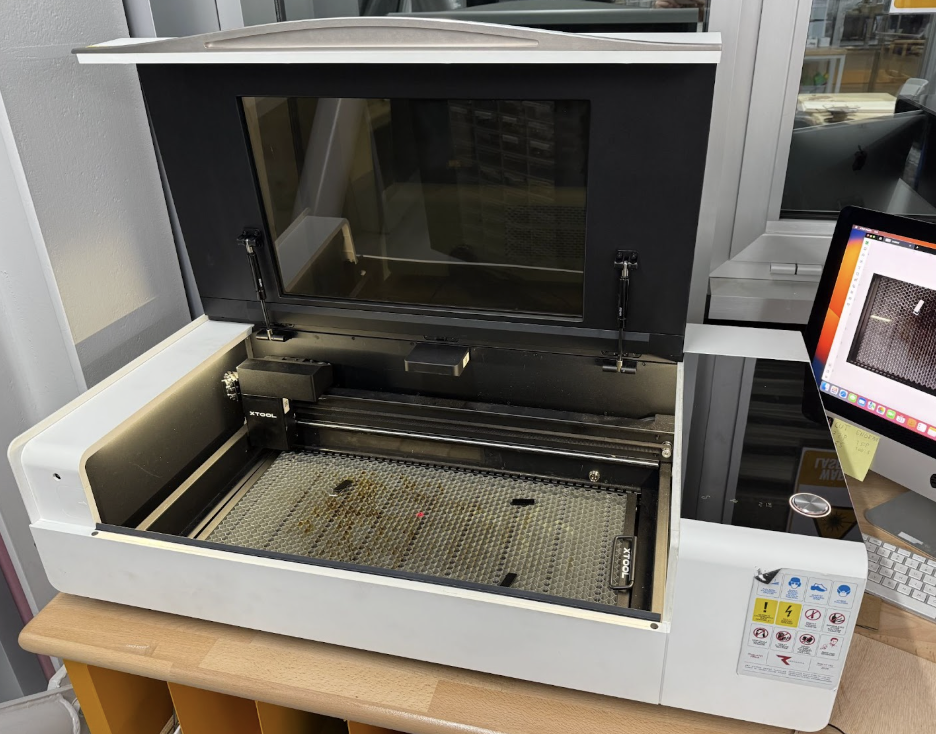
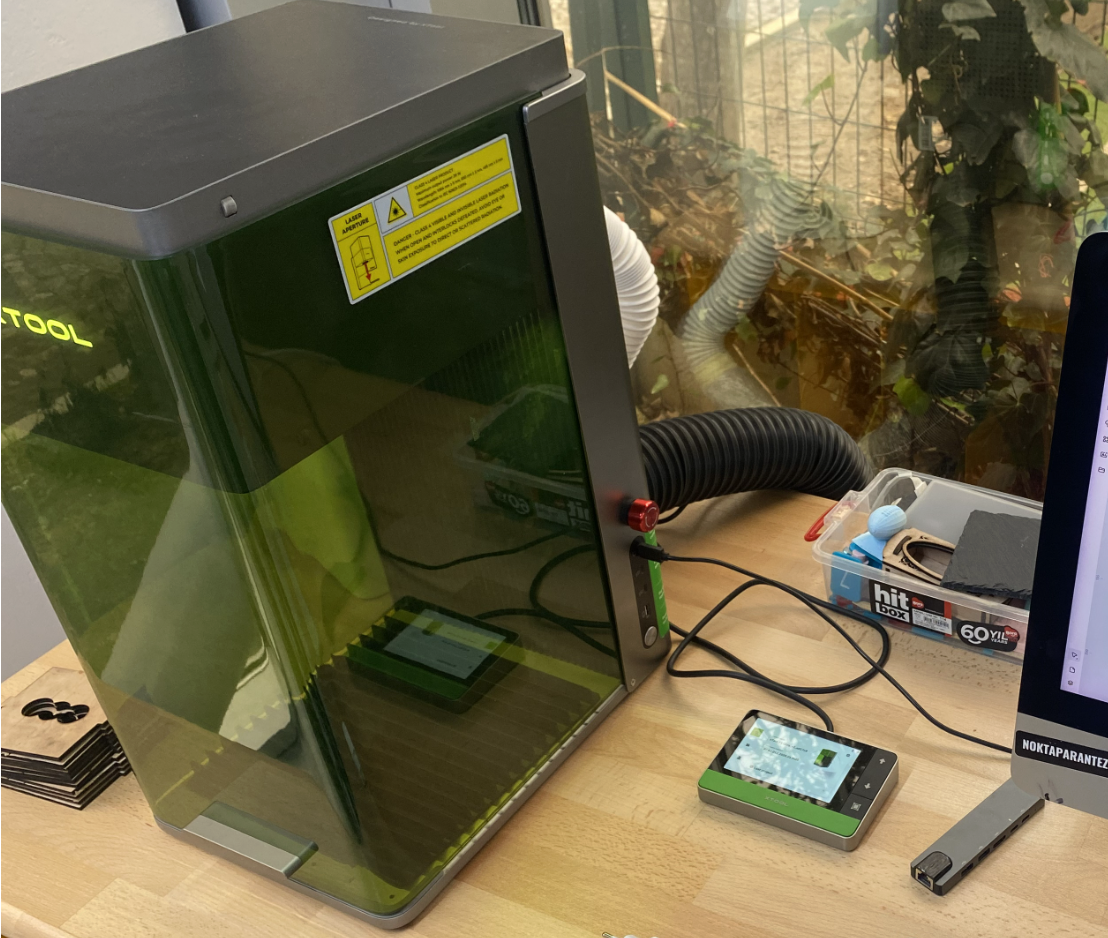
Before operating the xTool P2S laser cutter, all group members completed lab-specific safety training focused on fire prevention, ventilation, and correct machine handling.
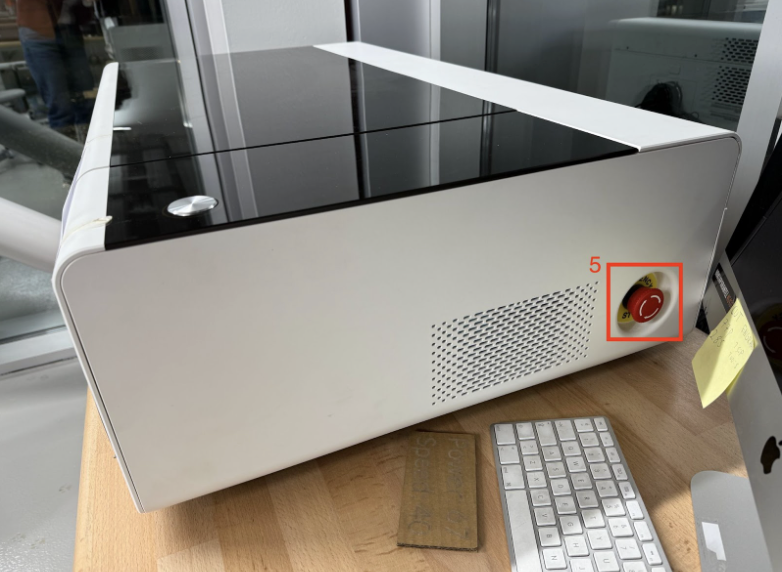
The xTool P2S is a CO₂ laser equipped with a camera-based positioning system. Despite the camera assistance, the machine must never be left unattended while operating. The emergency stop button was identified (labeled as 5) and demonstrated prior to use.
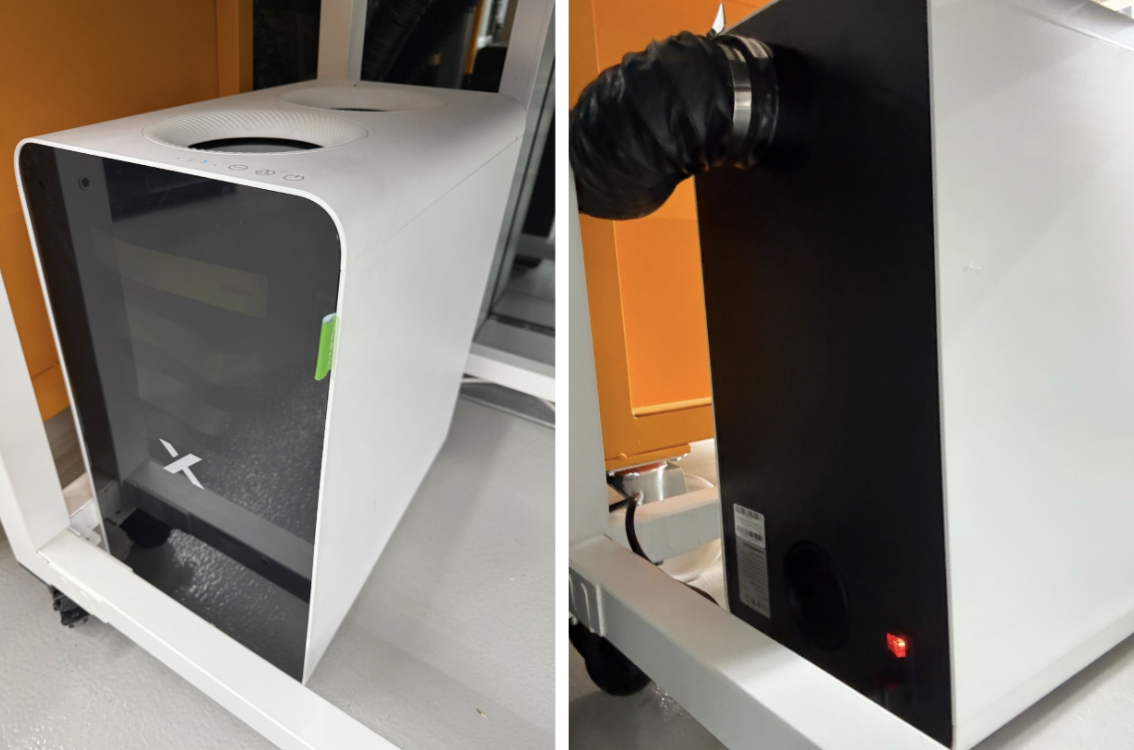
Before starting any cutting or engraving job, the external AP2 air purifier must be turned on to ensure proper fume extraction. Operation is not permitted if the filtration system is inactive.
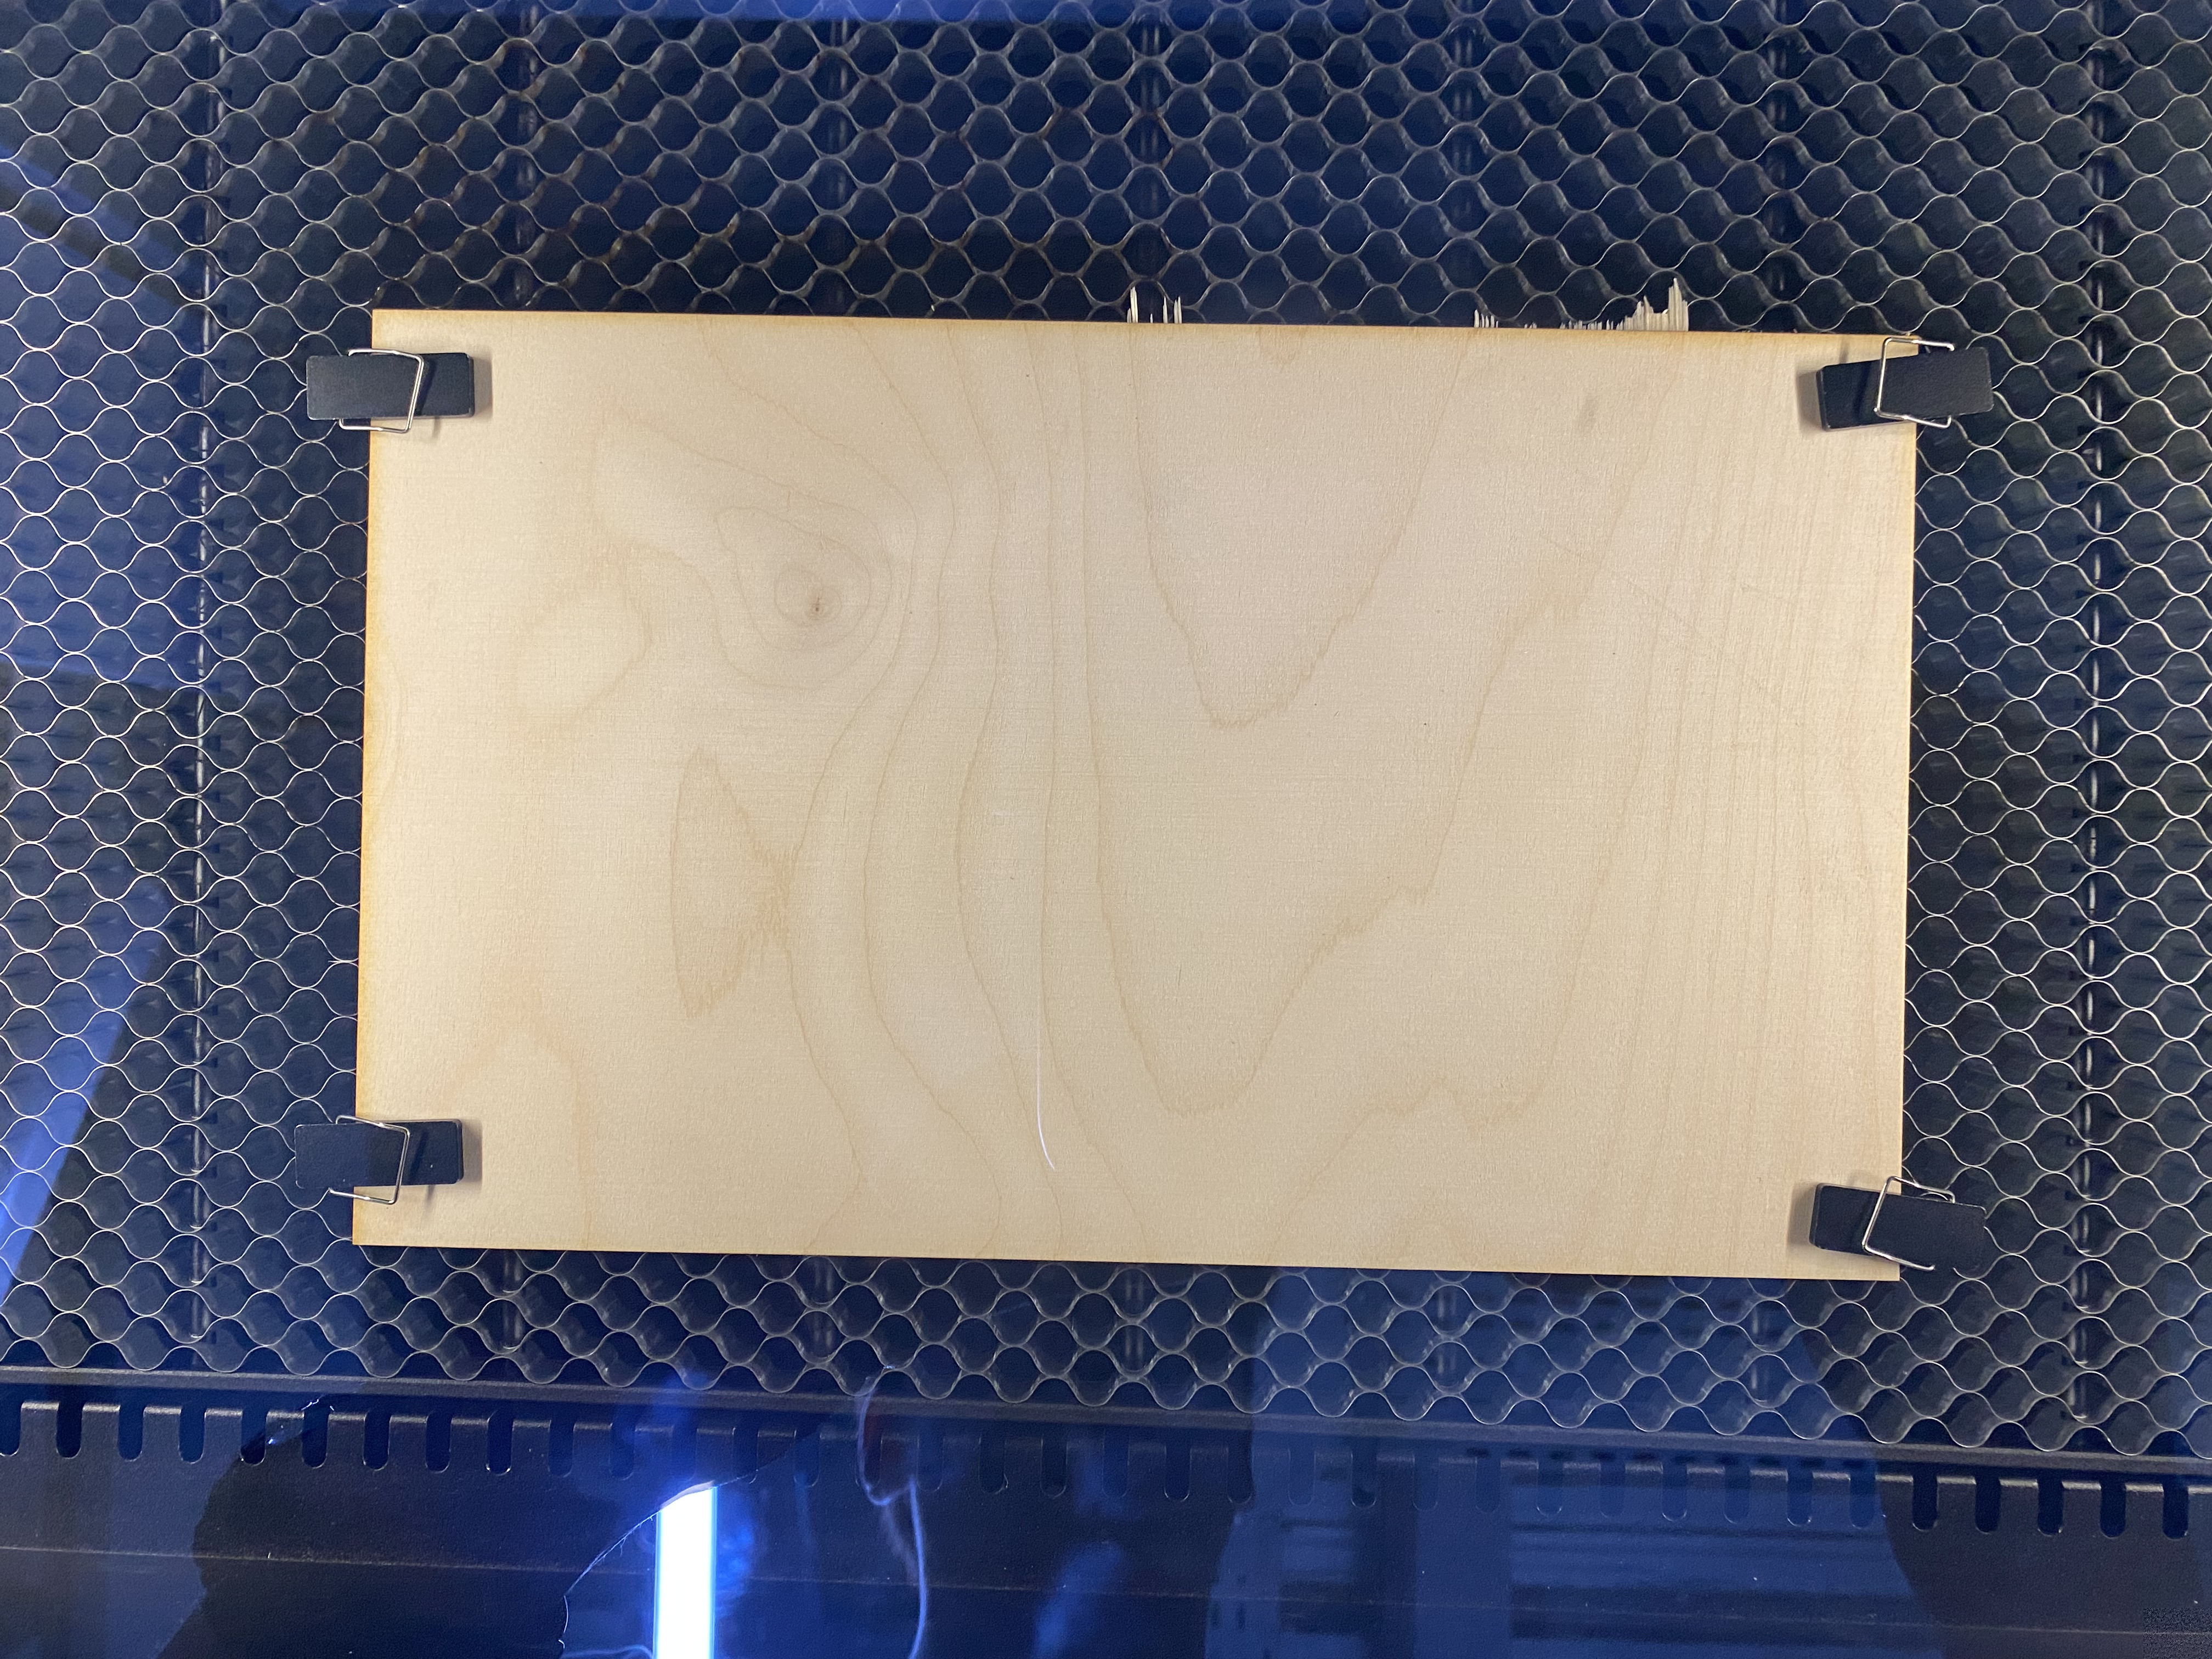
Materials are placed on the honeycomb bed and secured using magnetic pins. The pins must be positioned with the metal side facing down to prevent collisions with the laser nozzle.
The lid must remain closed during operation, and only approved materials were used according to lab safety guidelines.
The xTool P2S uses an automatic focusing system that sets the optimal distance between the laser lens and the material surface. To evaluate the effect of focus on cut quality, identical geometries were cut under correct focus and intentionally defocused conditions.
When the material was correctly focused, cuts were clean with minimal kerf and consistent depth.
Power and speed characterization was performed using the built-in xTool material test array. Separate test grids were generated for cutting and engraving on the same material.
Material: 3 mm plywood (wood).
Cut test result (P2S):
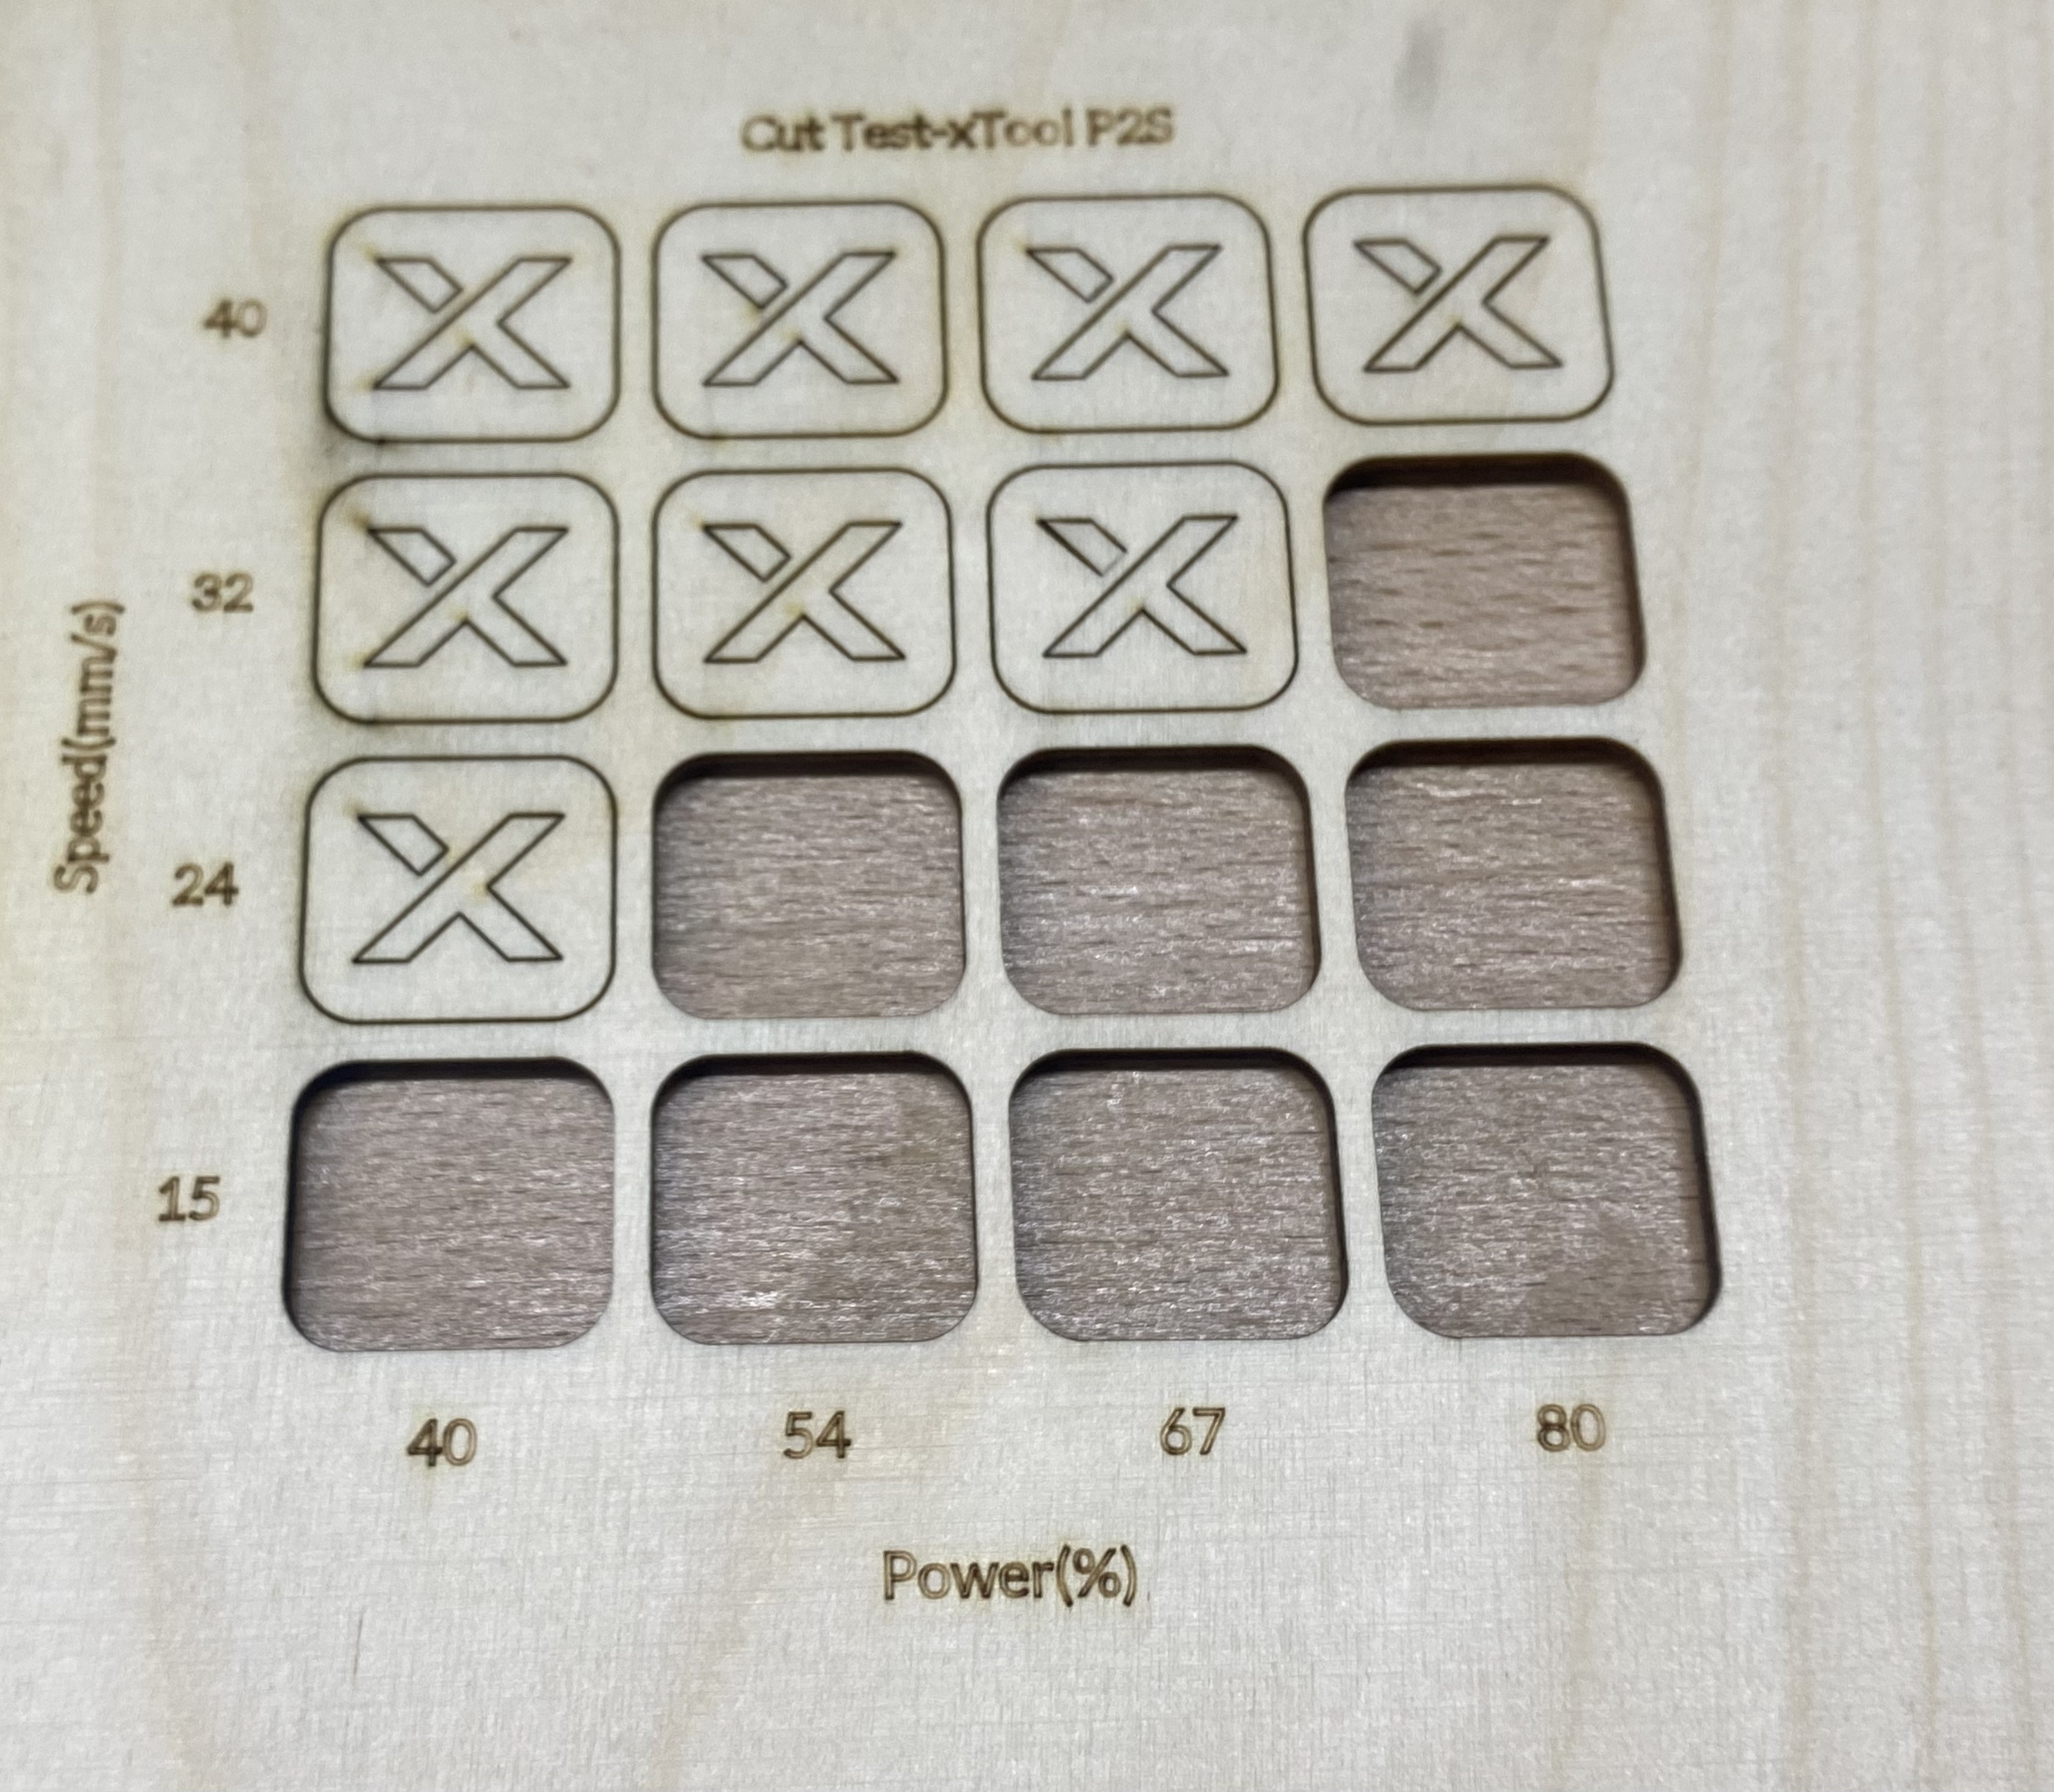
Low power or high speed resulted in incomplete cuts, while high power combined with low speed caused excessive burning. For this 3 mm plywood, the best cut result was achieved at 80 power and 32 speed.
Engraving test result (P2S):
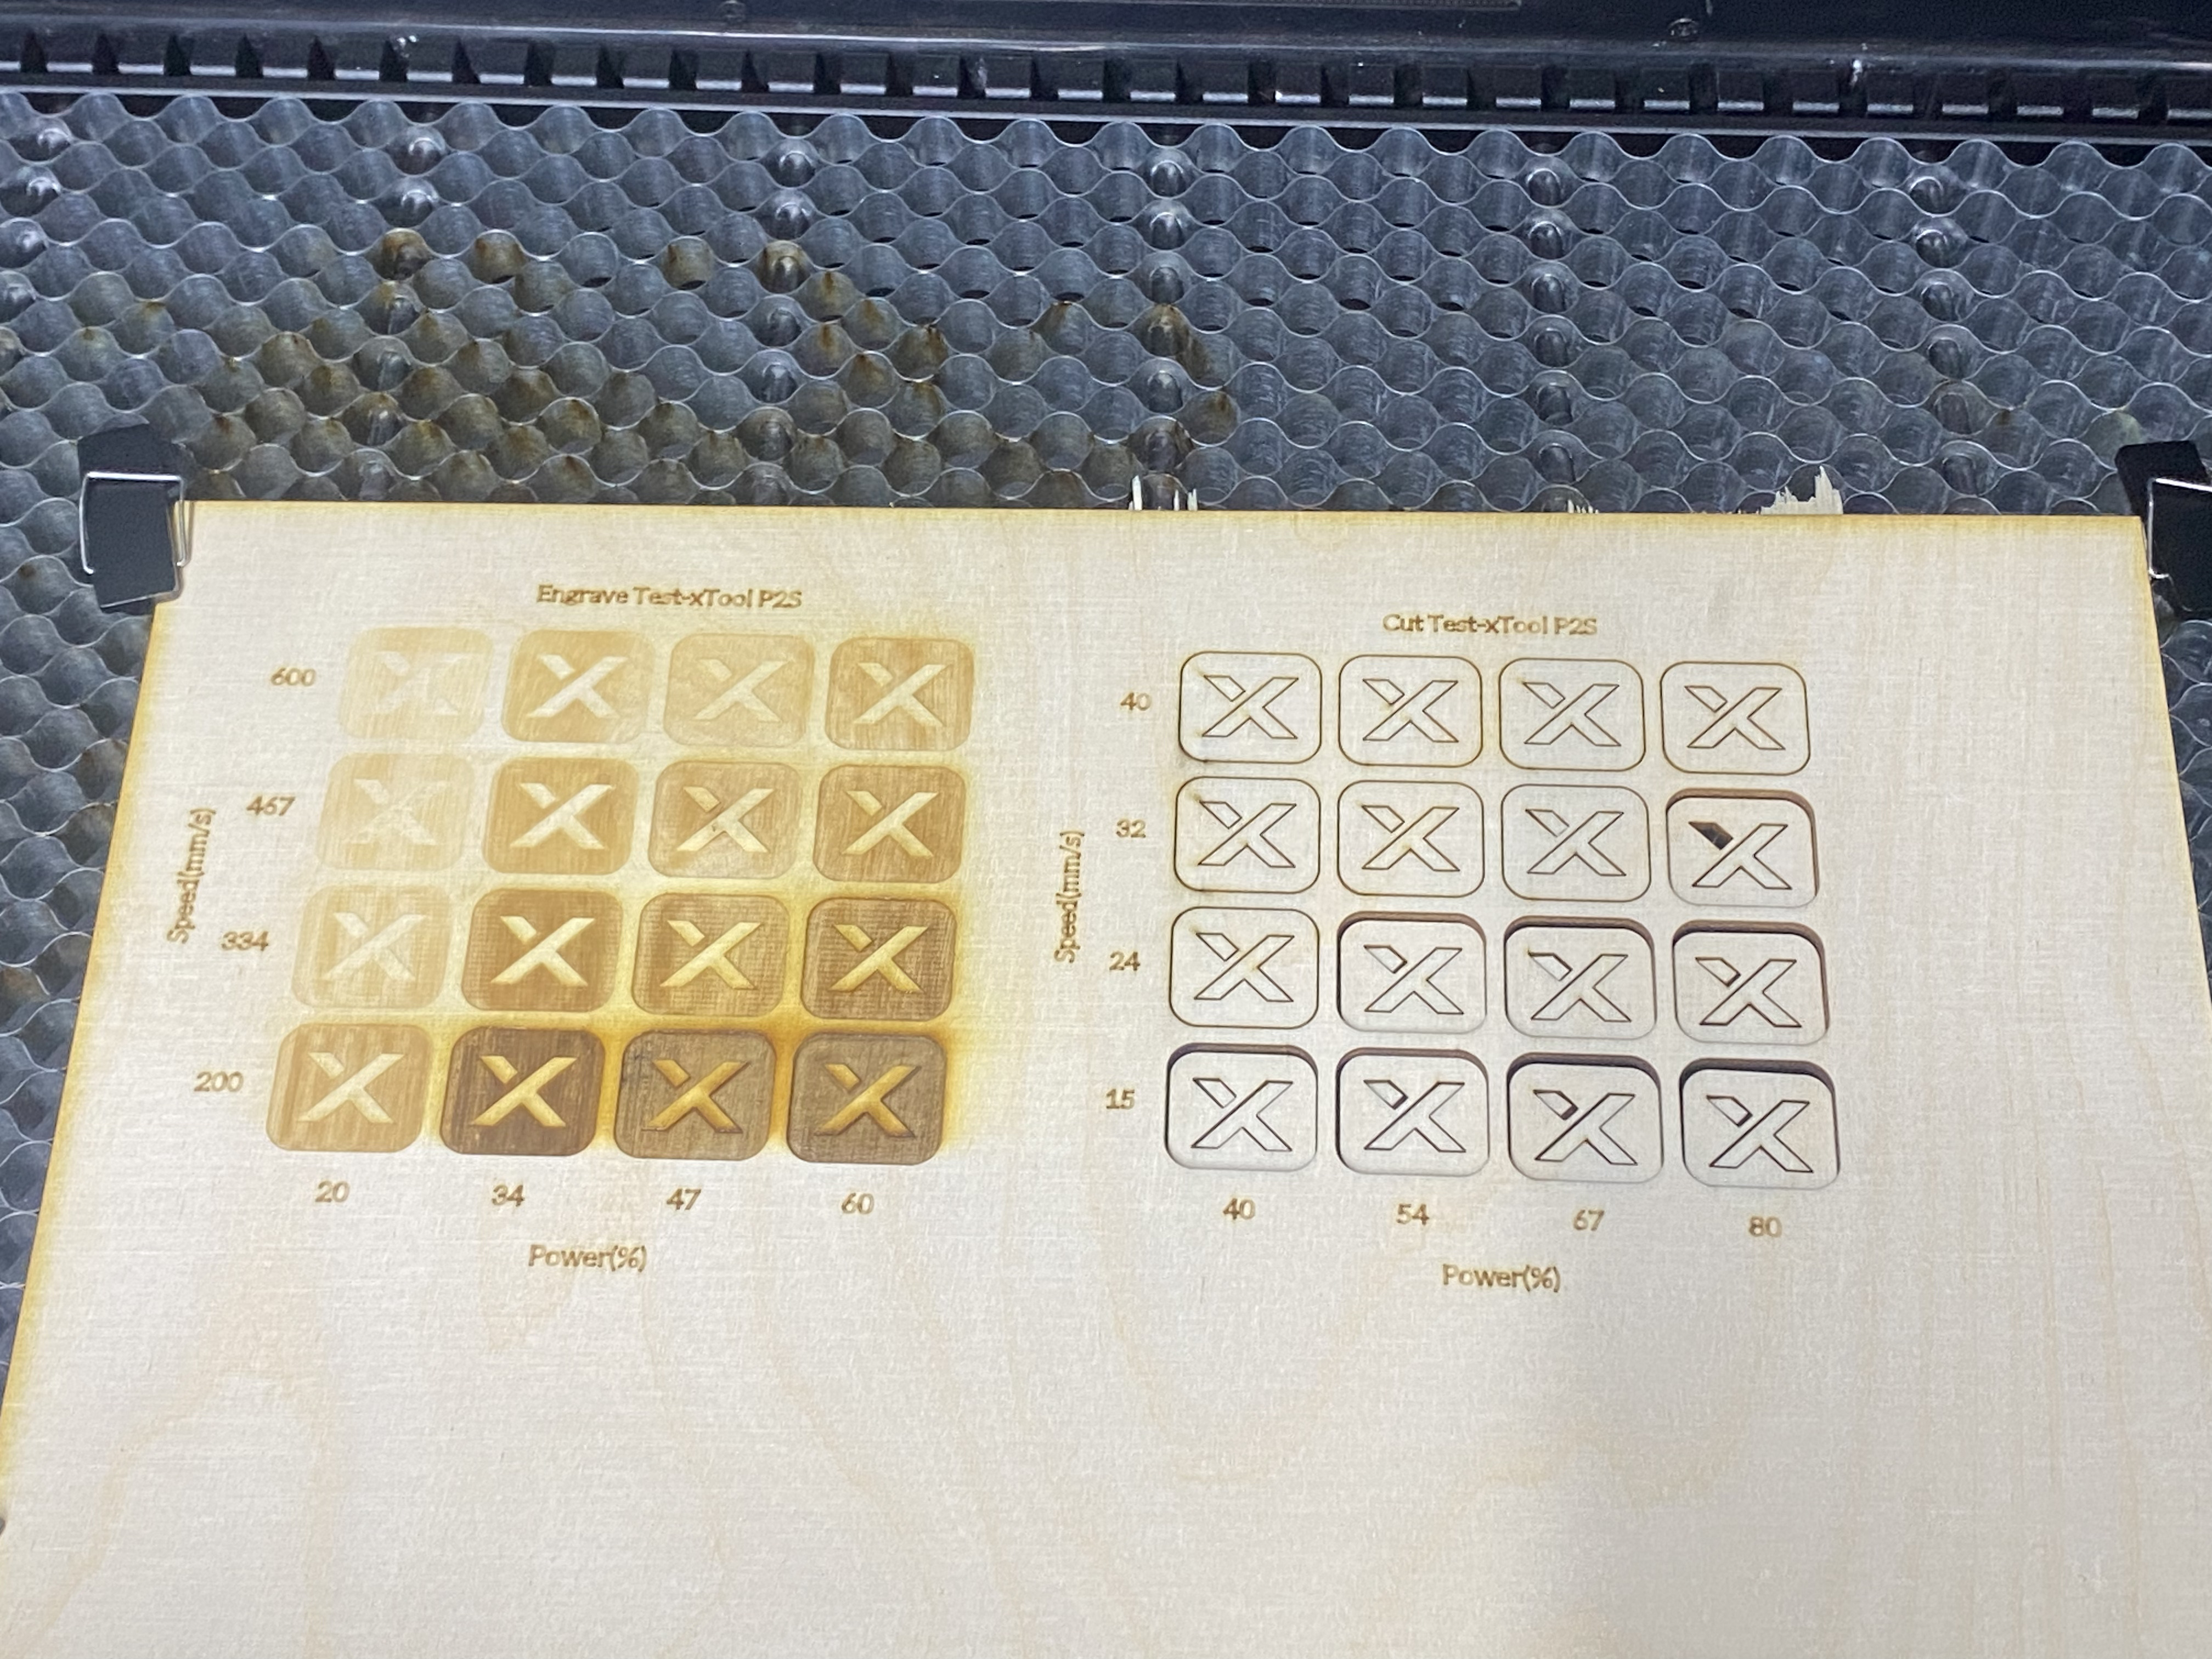
For engraving on the same material, the clearest engraving result was achieved at 34 power and 200 speed.
In the xTool P2S, the cutting rate corresponds directly to the laser head movement speed. The rate is controlled through the speed parameter in the software and does not exist as a separate setting.
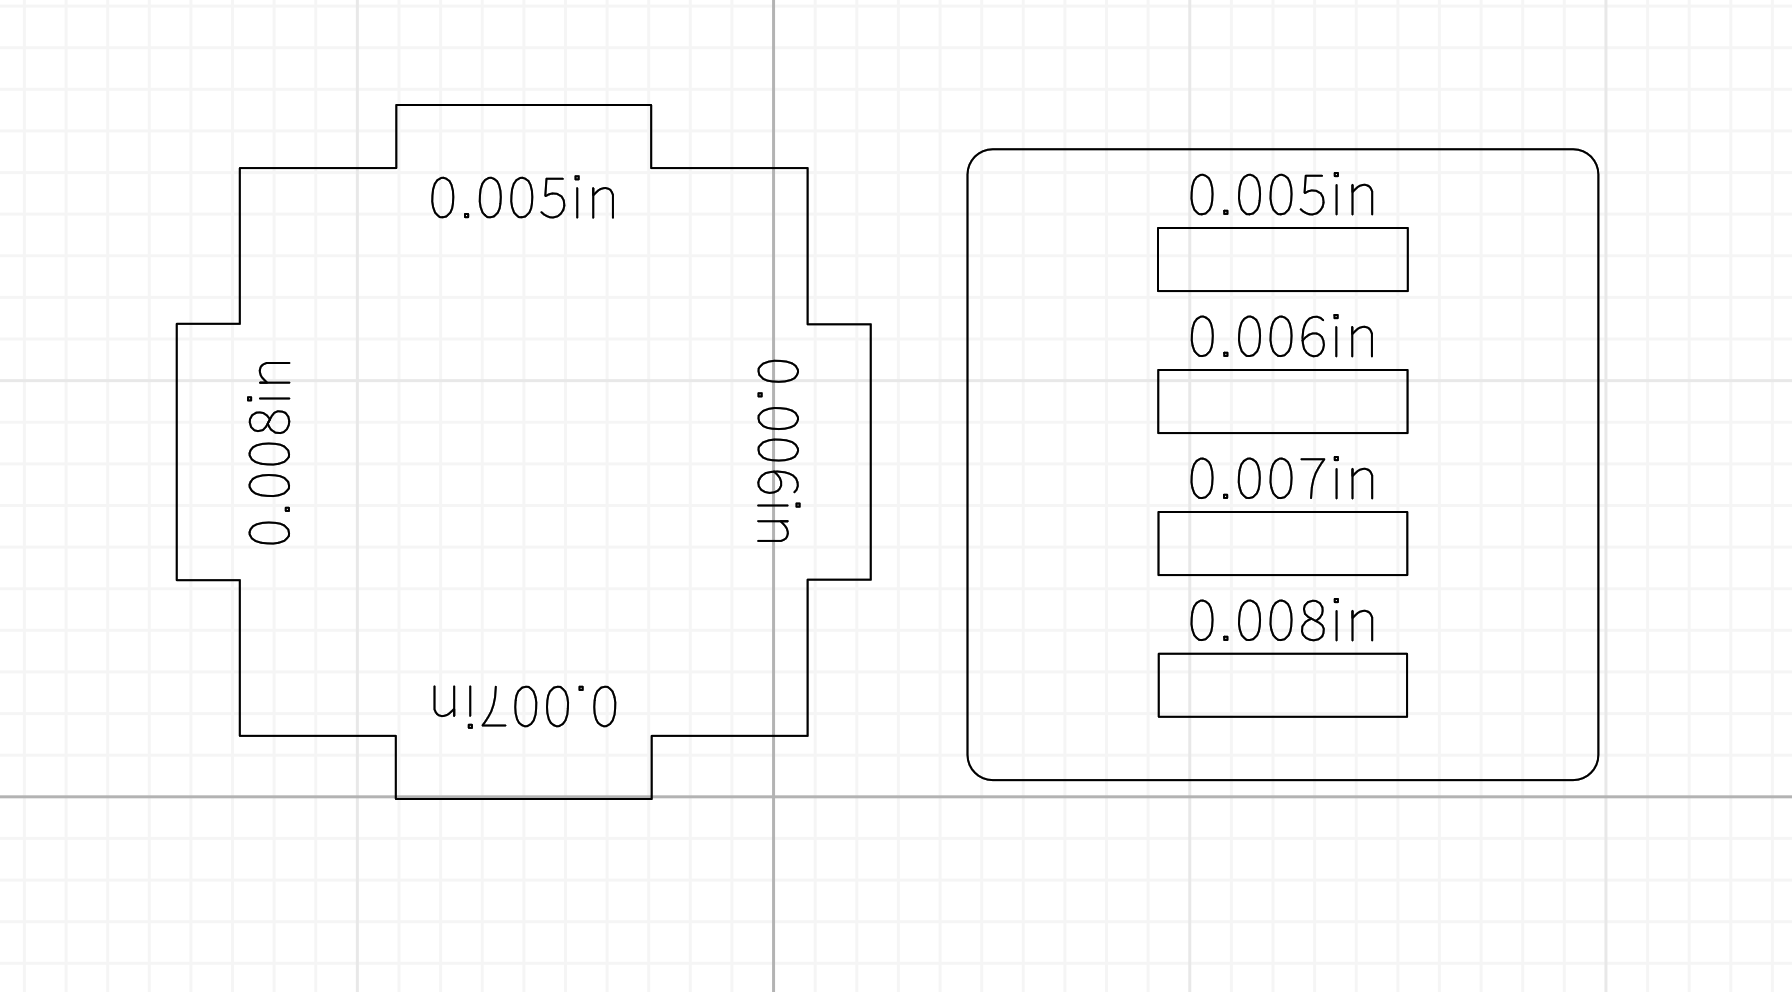
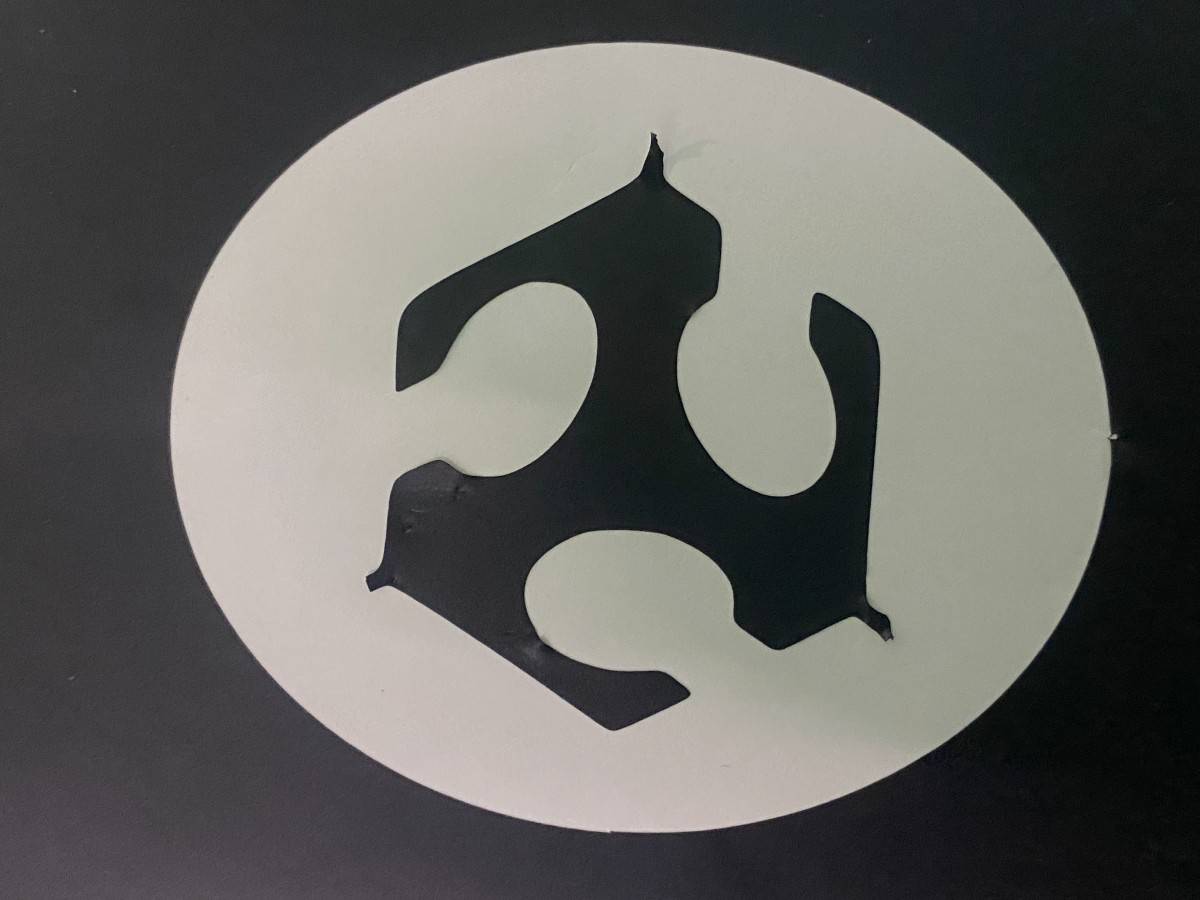
Kerf was measured by cutting rectangular test geometries with known dimensions and comparing the intended dimensions to the actual measured parts using calipers (kumpas).

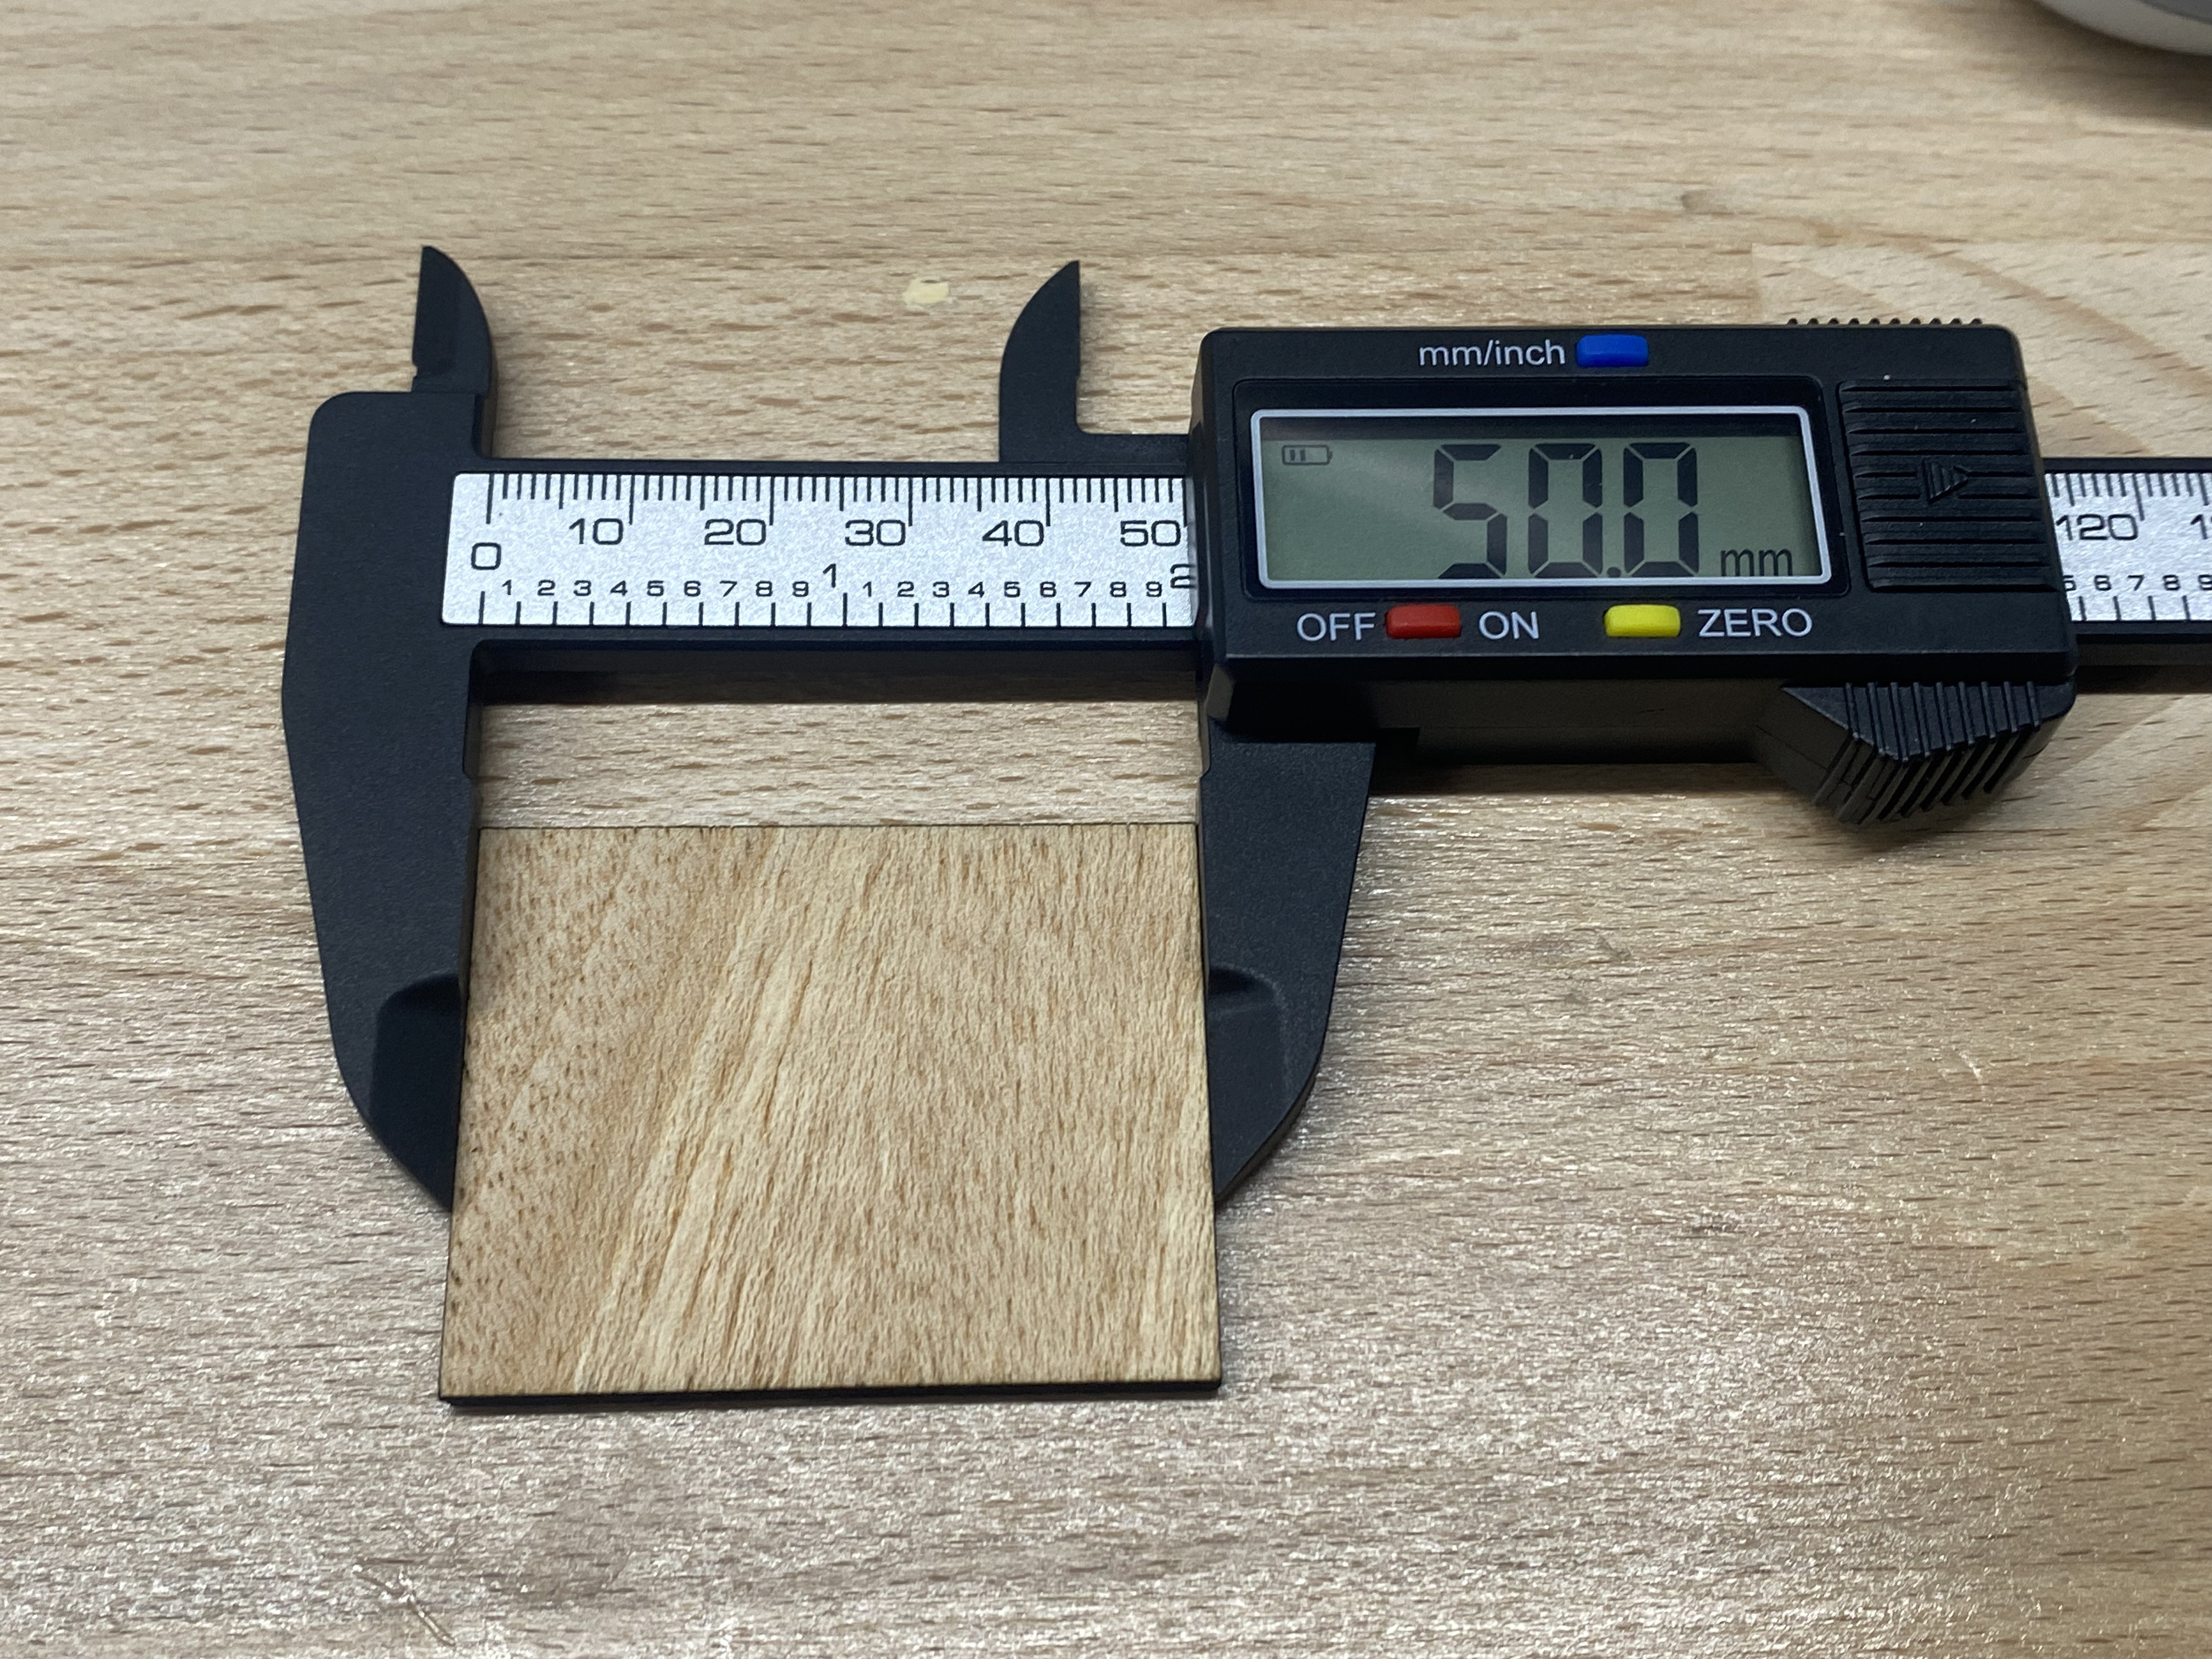
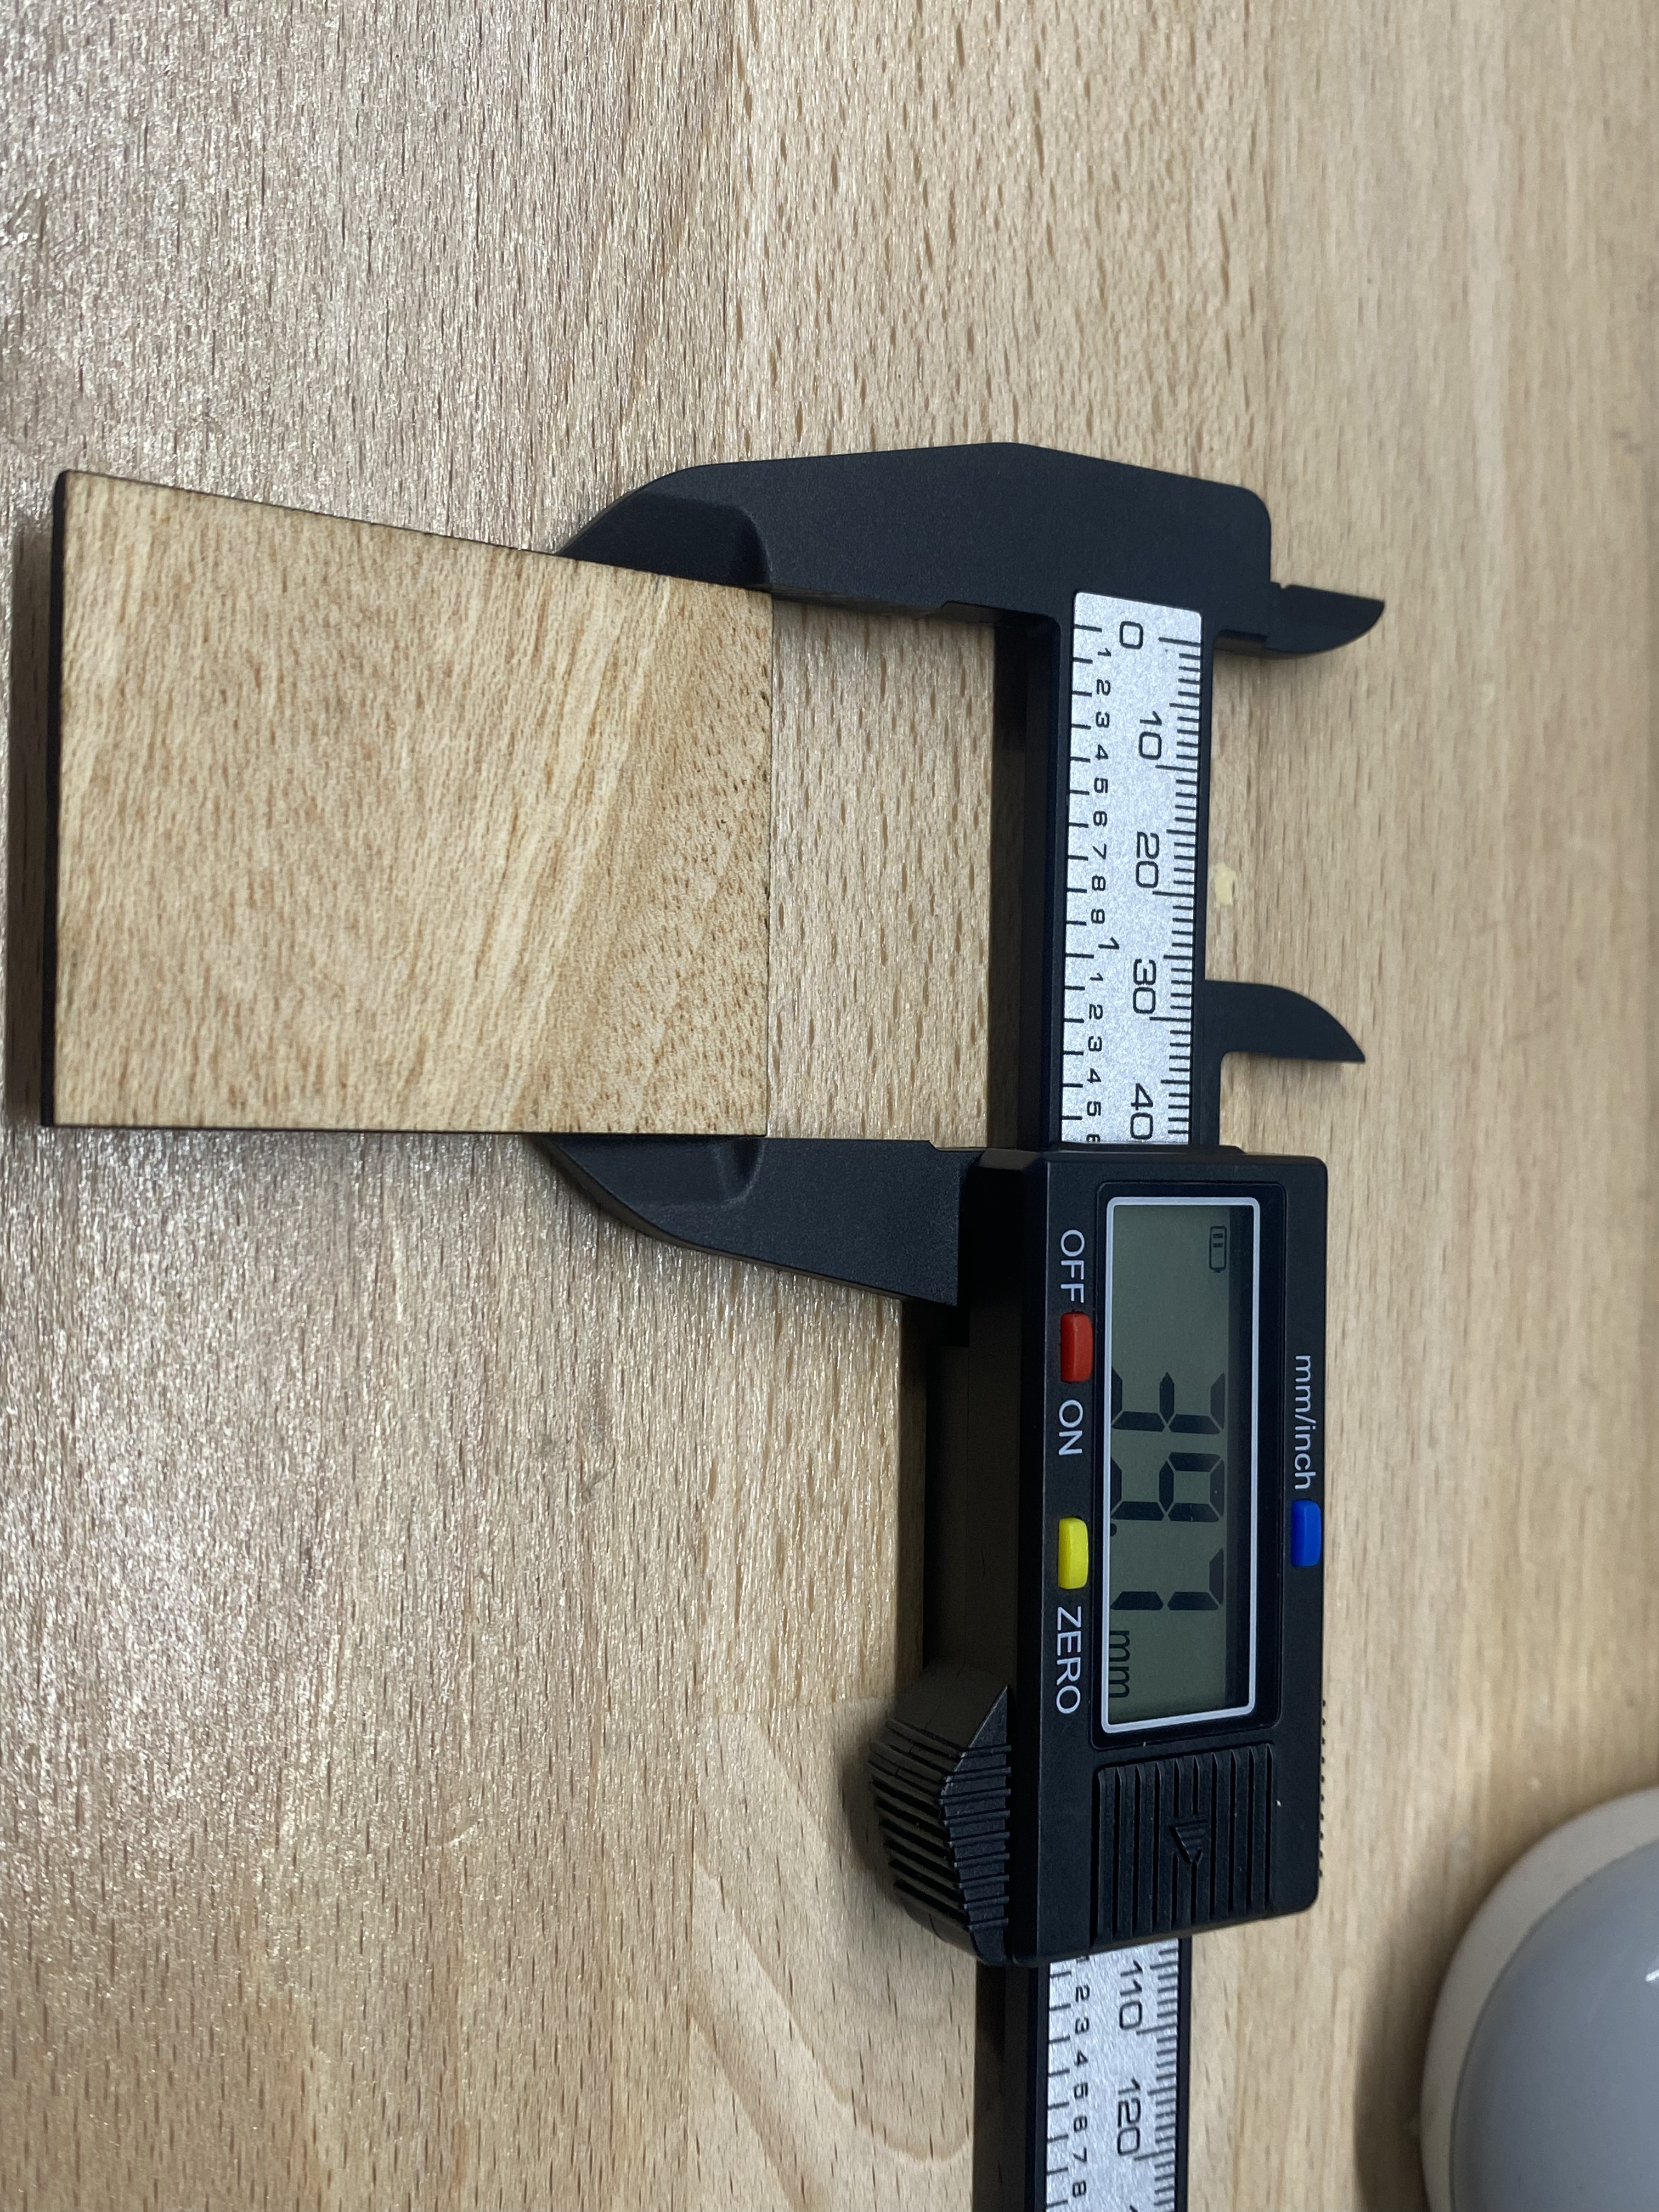
The design values were 50.29 mm and 40.00 mm. The measured values were 50.00 mm and 39.70 mm. Based on these differences, the measured kerf value for this setup/material was 0.30 mm.
This kerf value was later used in parametric design calculations to compensate for material removal and to ensure accurate press-fit joints.
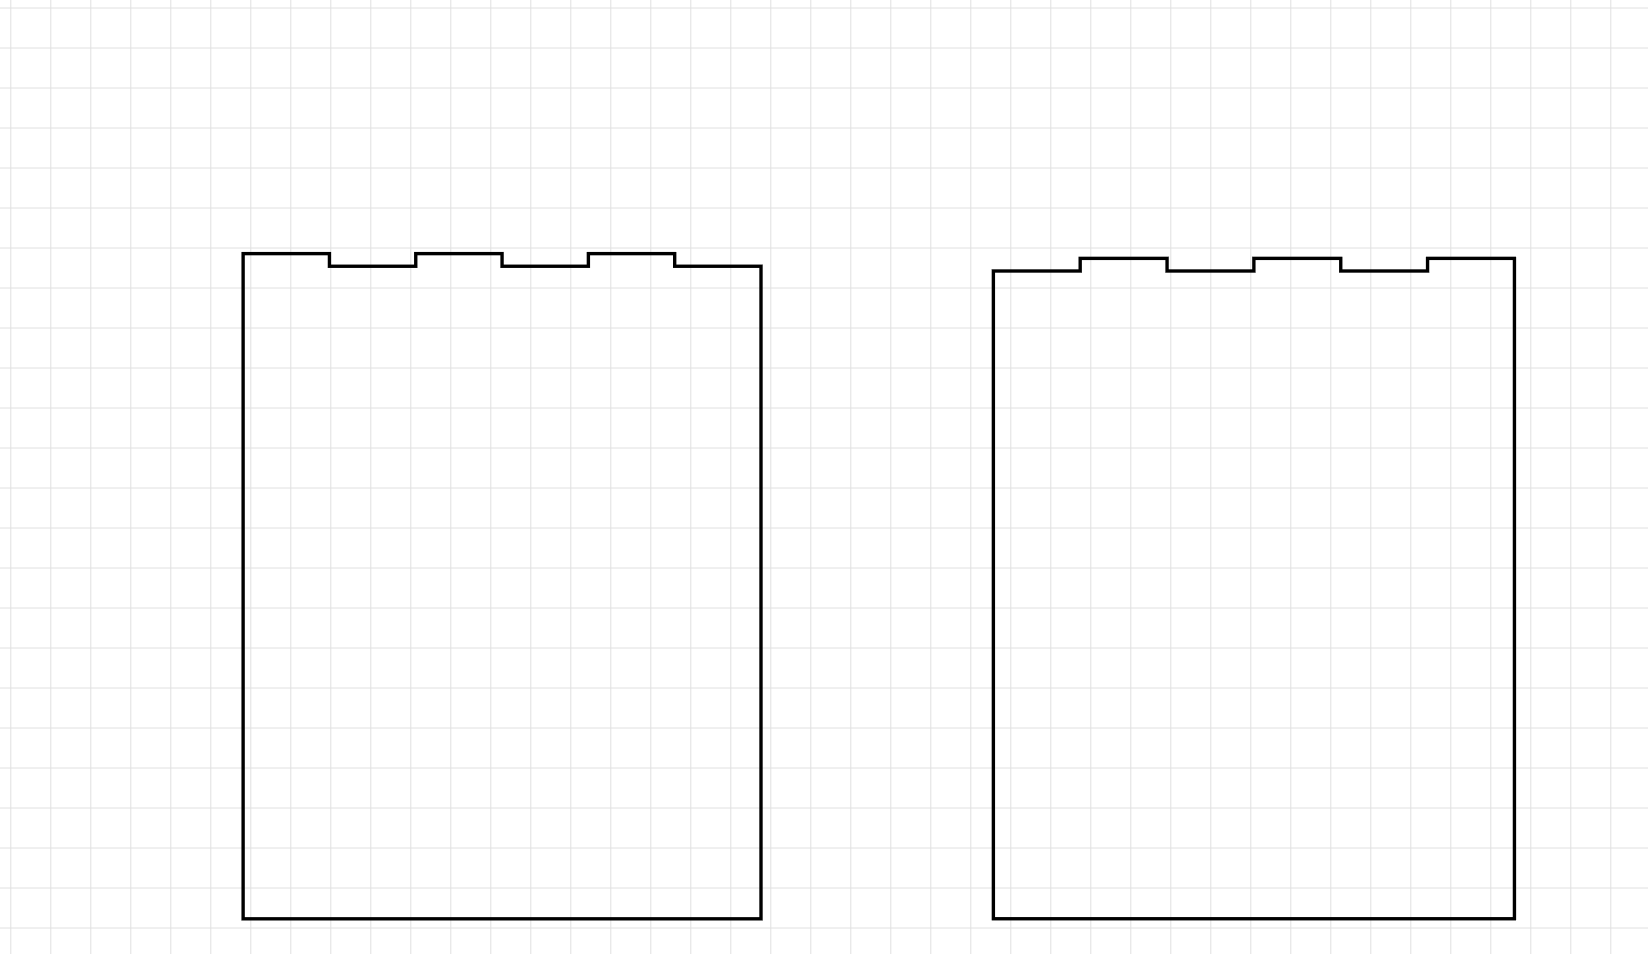
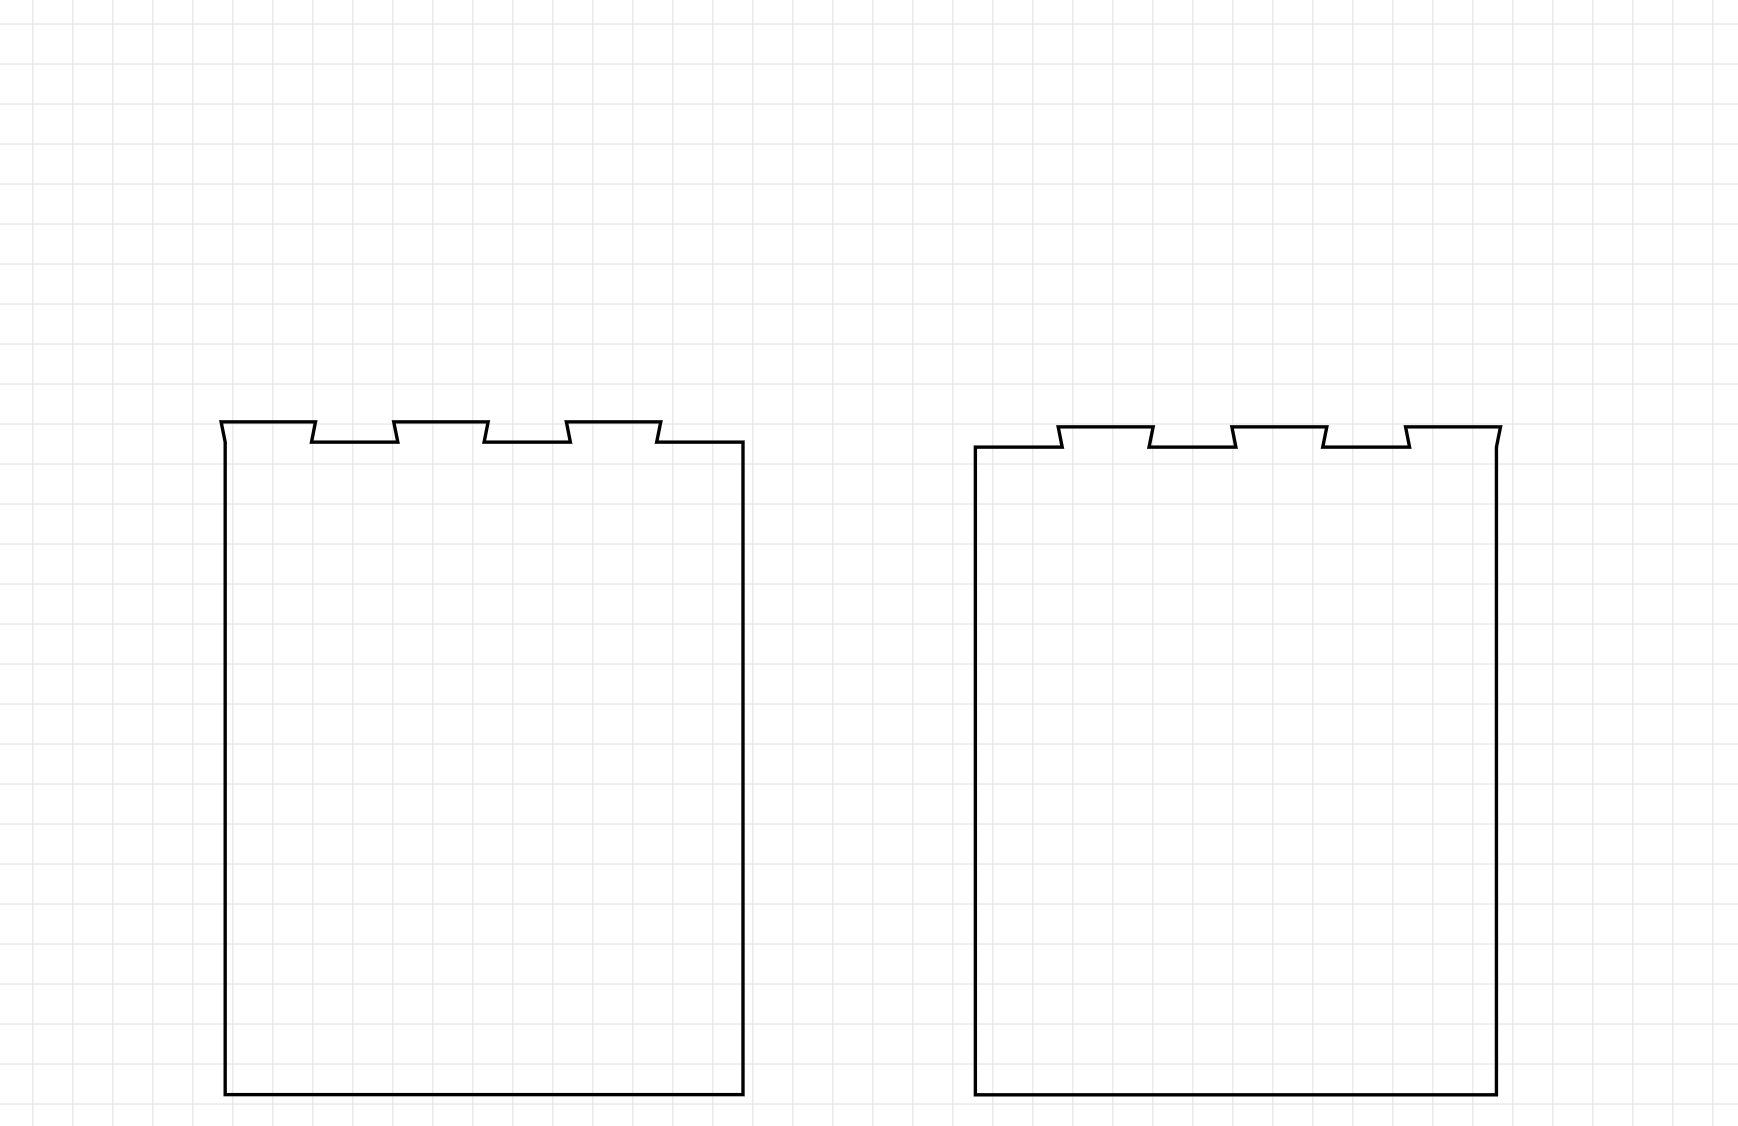
Joint clearance was evaluated using press-fit joint samples with varying slot widths. Slot dimensions were parametrically adjusted using the measured kerf value.
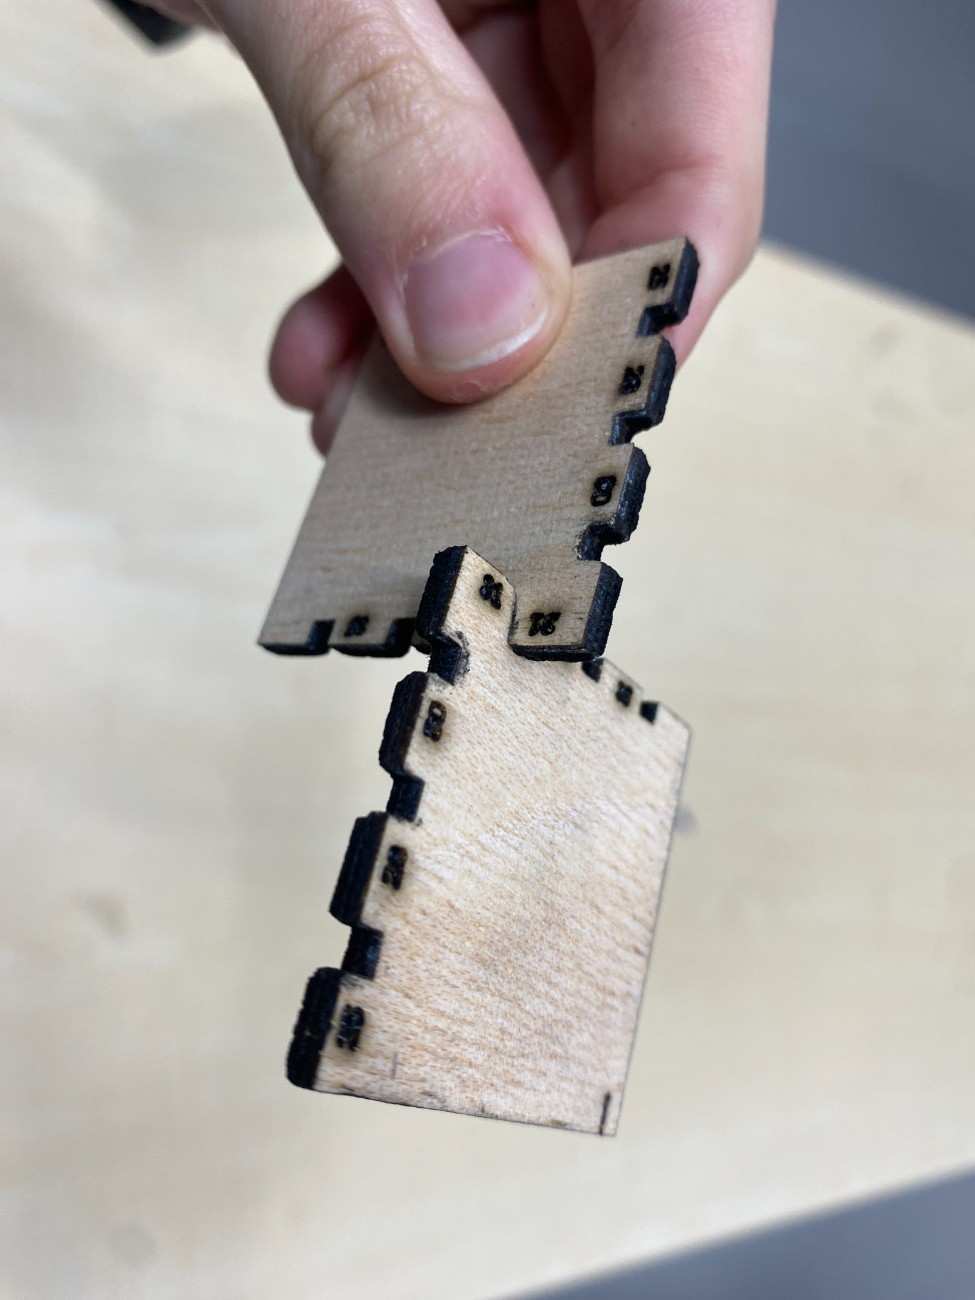
A clearance of 0.05 mm produced the best results, allowing firm assembly without excessive force while avoiding material damage. This clearance ensured repeatable press-fit assembly and reliable structural stability.
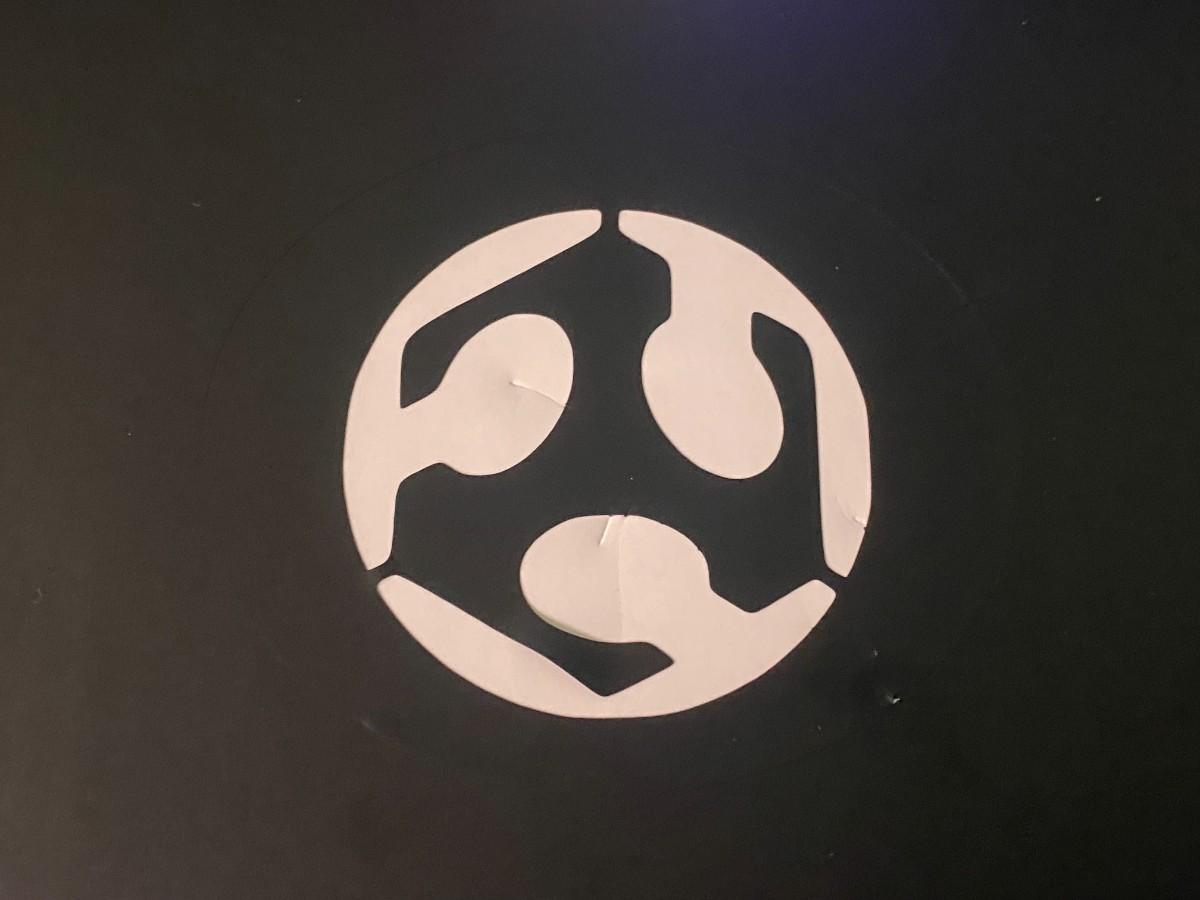
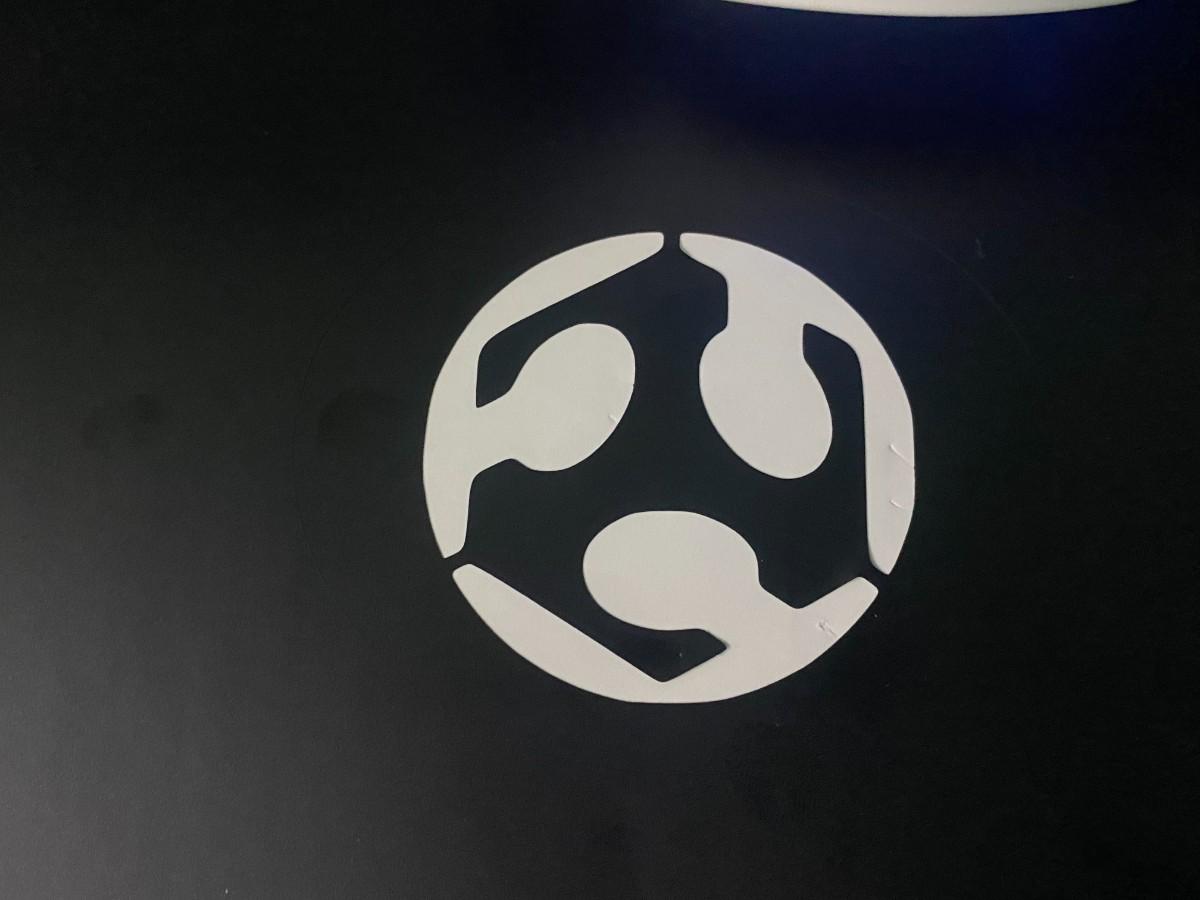
The xTool P2S is well-suited for planar laser-cut joints. We experimented with designing different joint types; below are our finger joint, tab-and-slot, and dovetail joint test pieces (our most recently added designs):
Finger joint — used to join boards end-to-end.
Tab and slot joint — used for quick, accurate assembly and alignment of parts.
Dovetail joint — used where strong corner joints are needed (e.g. drawers).
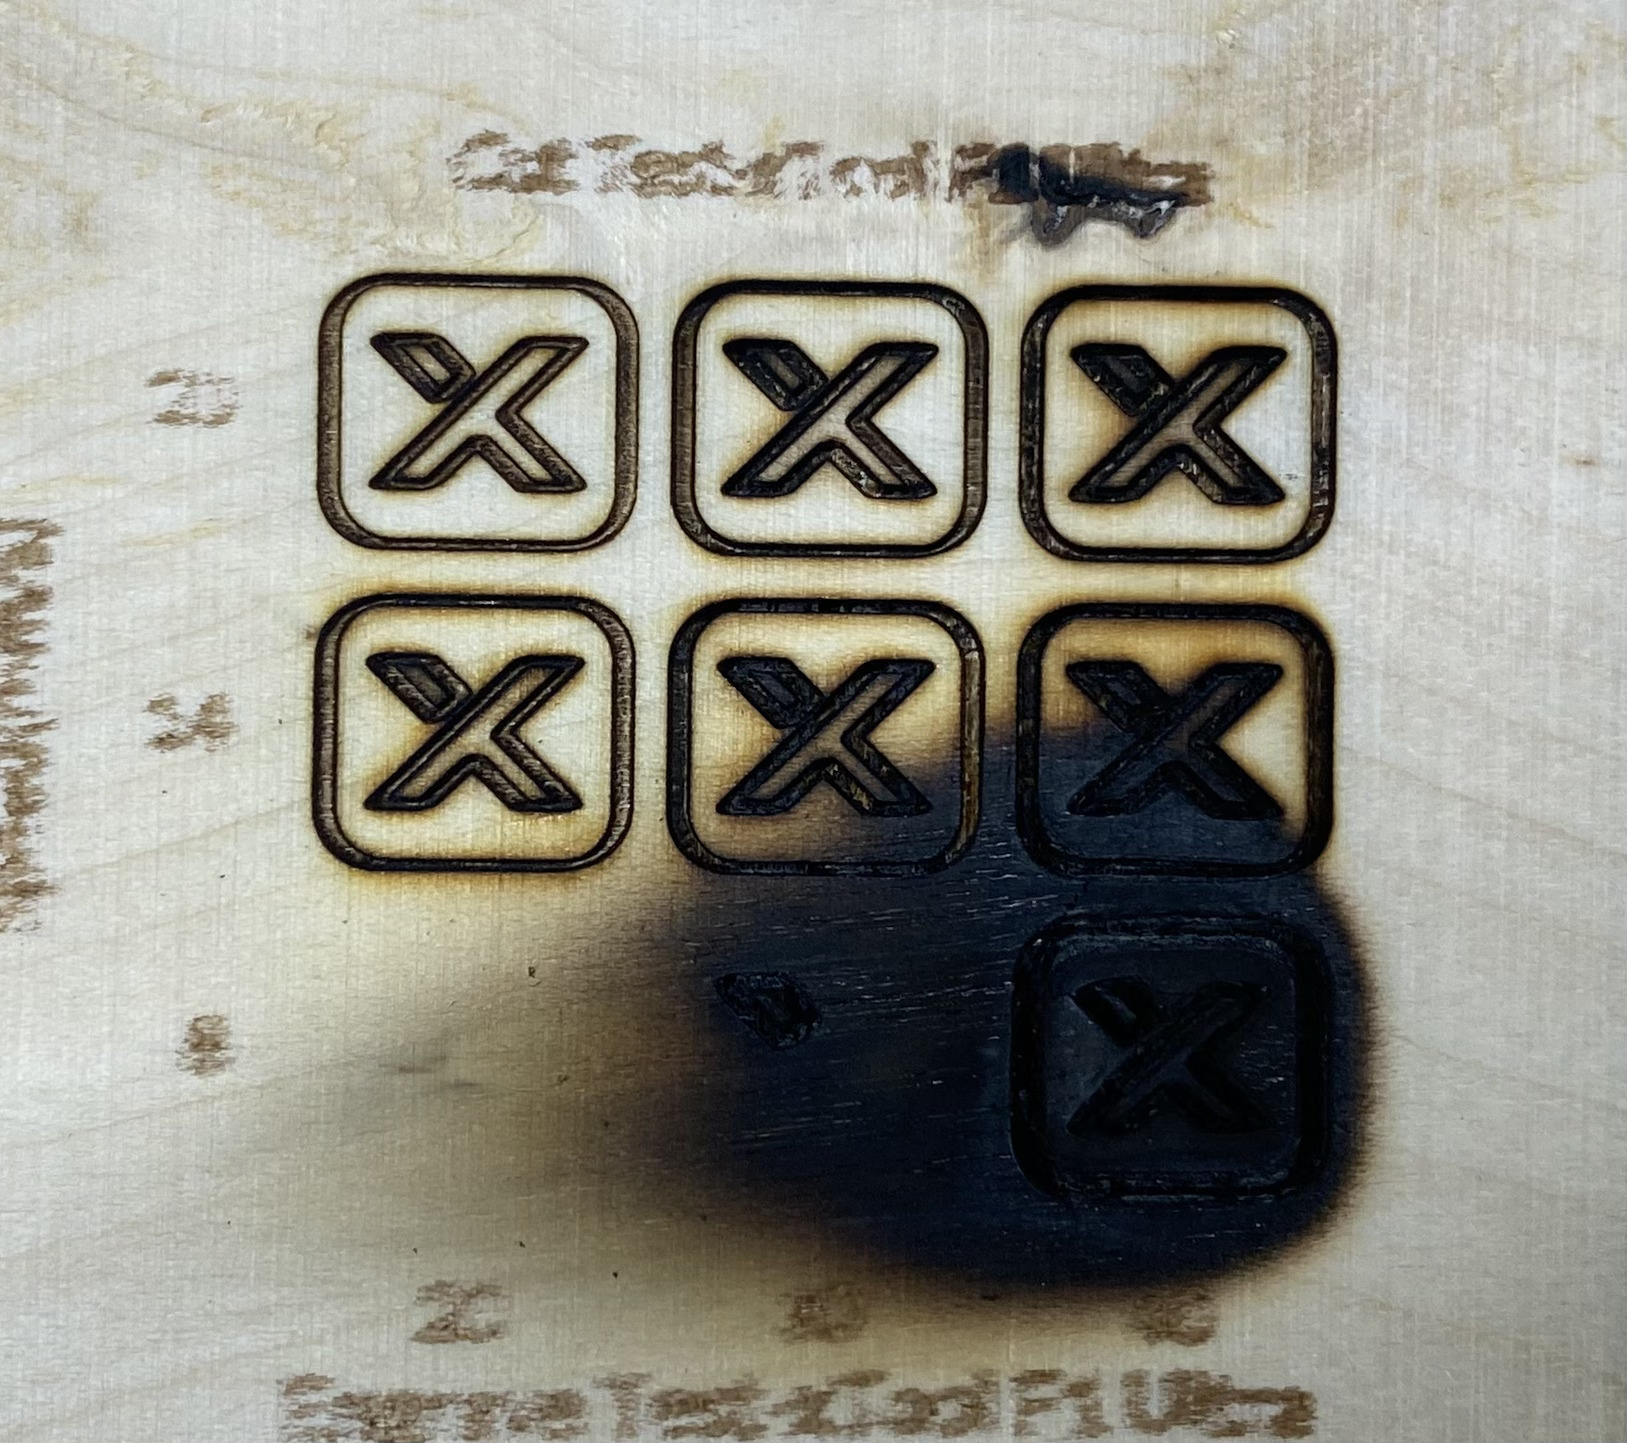
Safety training for the xTool F1 Ultra focused on controlled engraving practices, ventilation, and awareness of unknown material behavior.
The F1 Ultra is primarily used for engraving and marking rather than structural cutting. Because engraving often involves pre-manufactured objects with unknown material composition, conservative power settings and short test passes were used to minimize thermal damage and fumes.
Ventilation was confirmed before each operation, and the machine was never operated unattended. Users were instructed not to touch engraved objects immediately after processing due to potential residual heat.
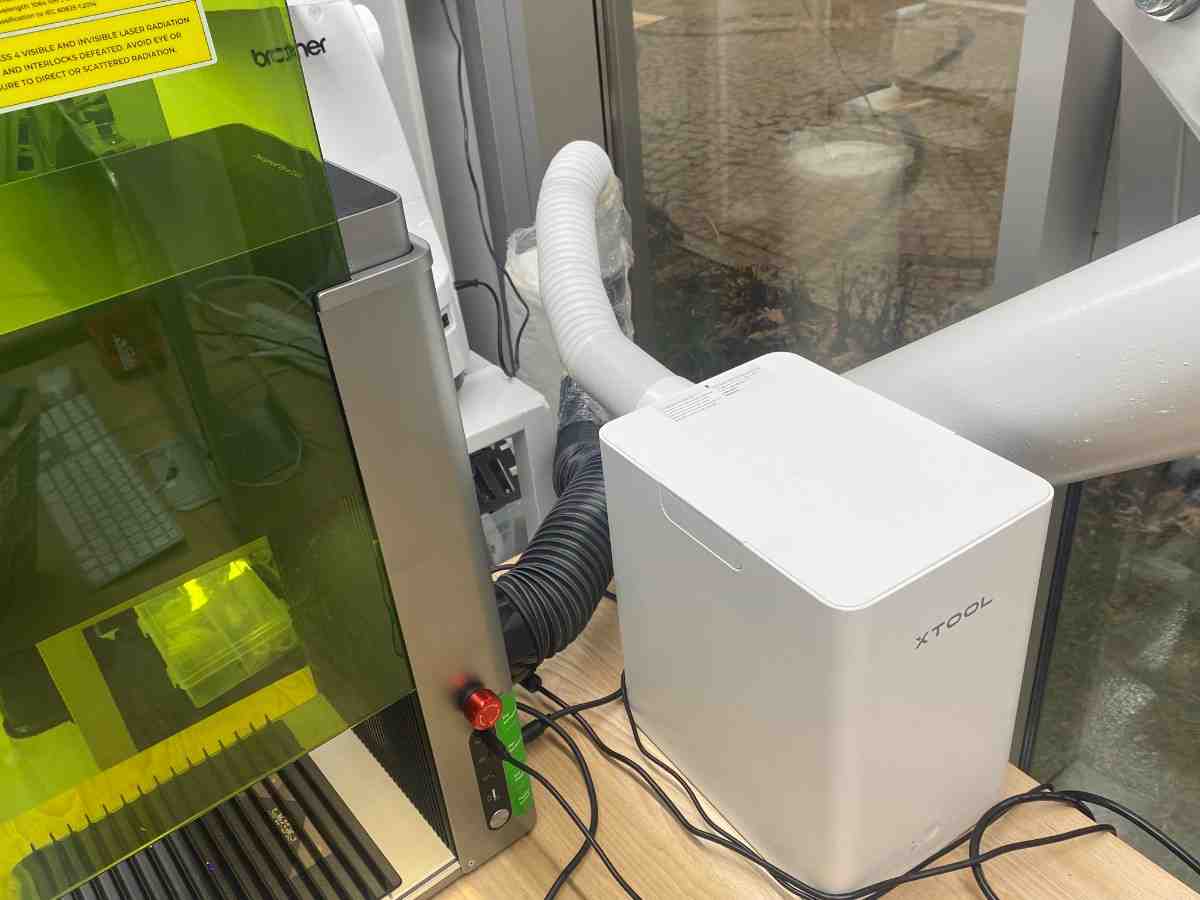
The emergency stop and power controls were identified before operation.
Engraving and cutting tests were performed on wood.
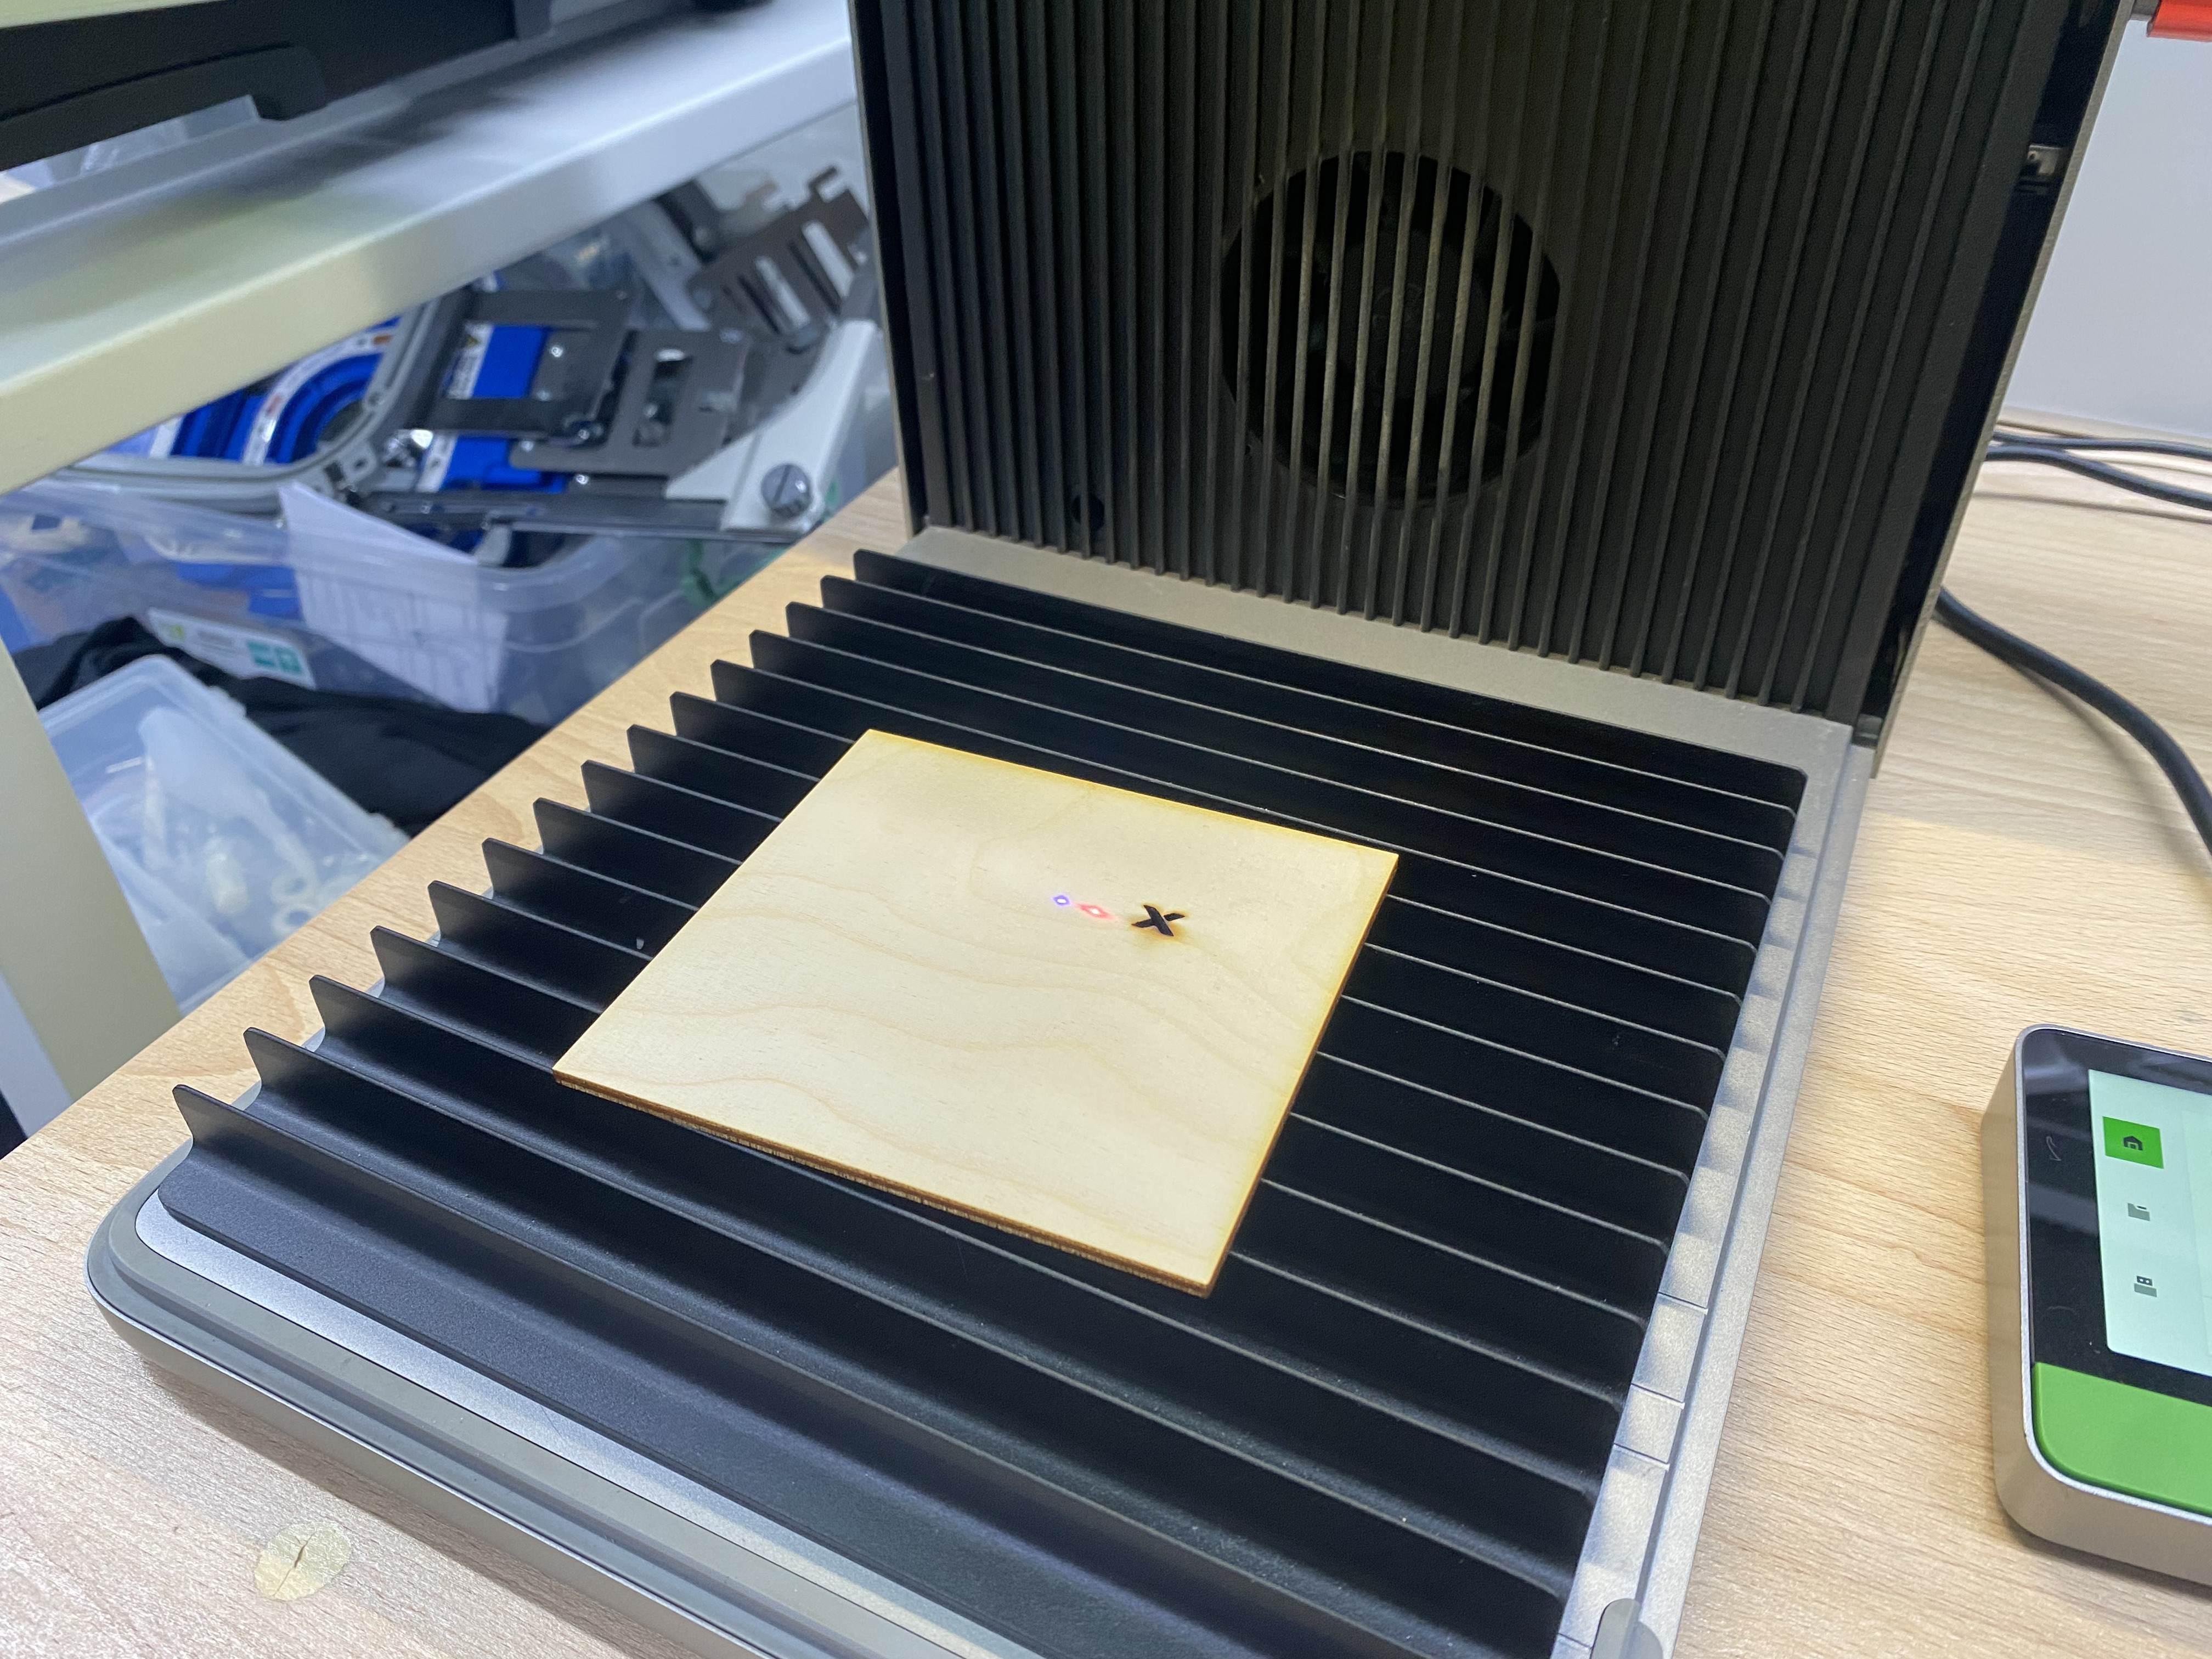
The material was placed flat and secured before starting each test to ensure consistent results.
An engraving test was conducted using xTool’s software interface to evaluate marking quality on wood.
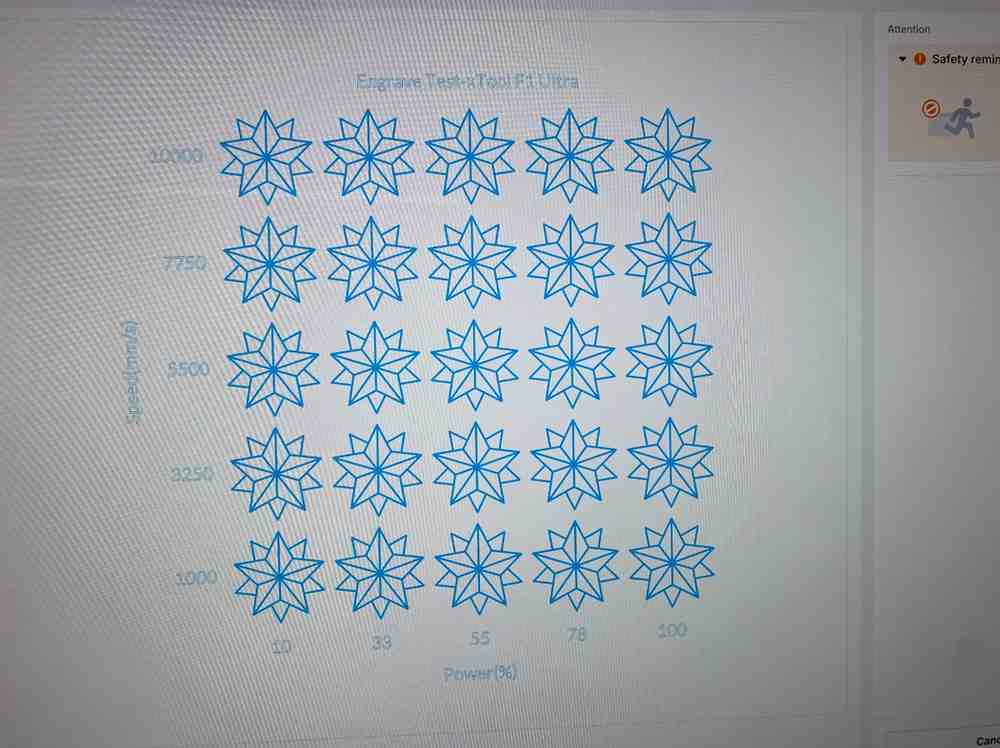
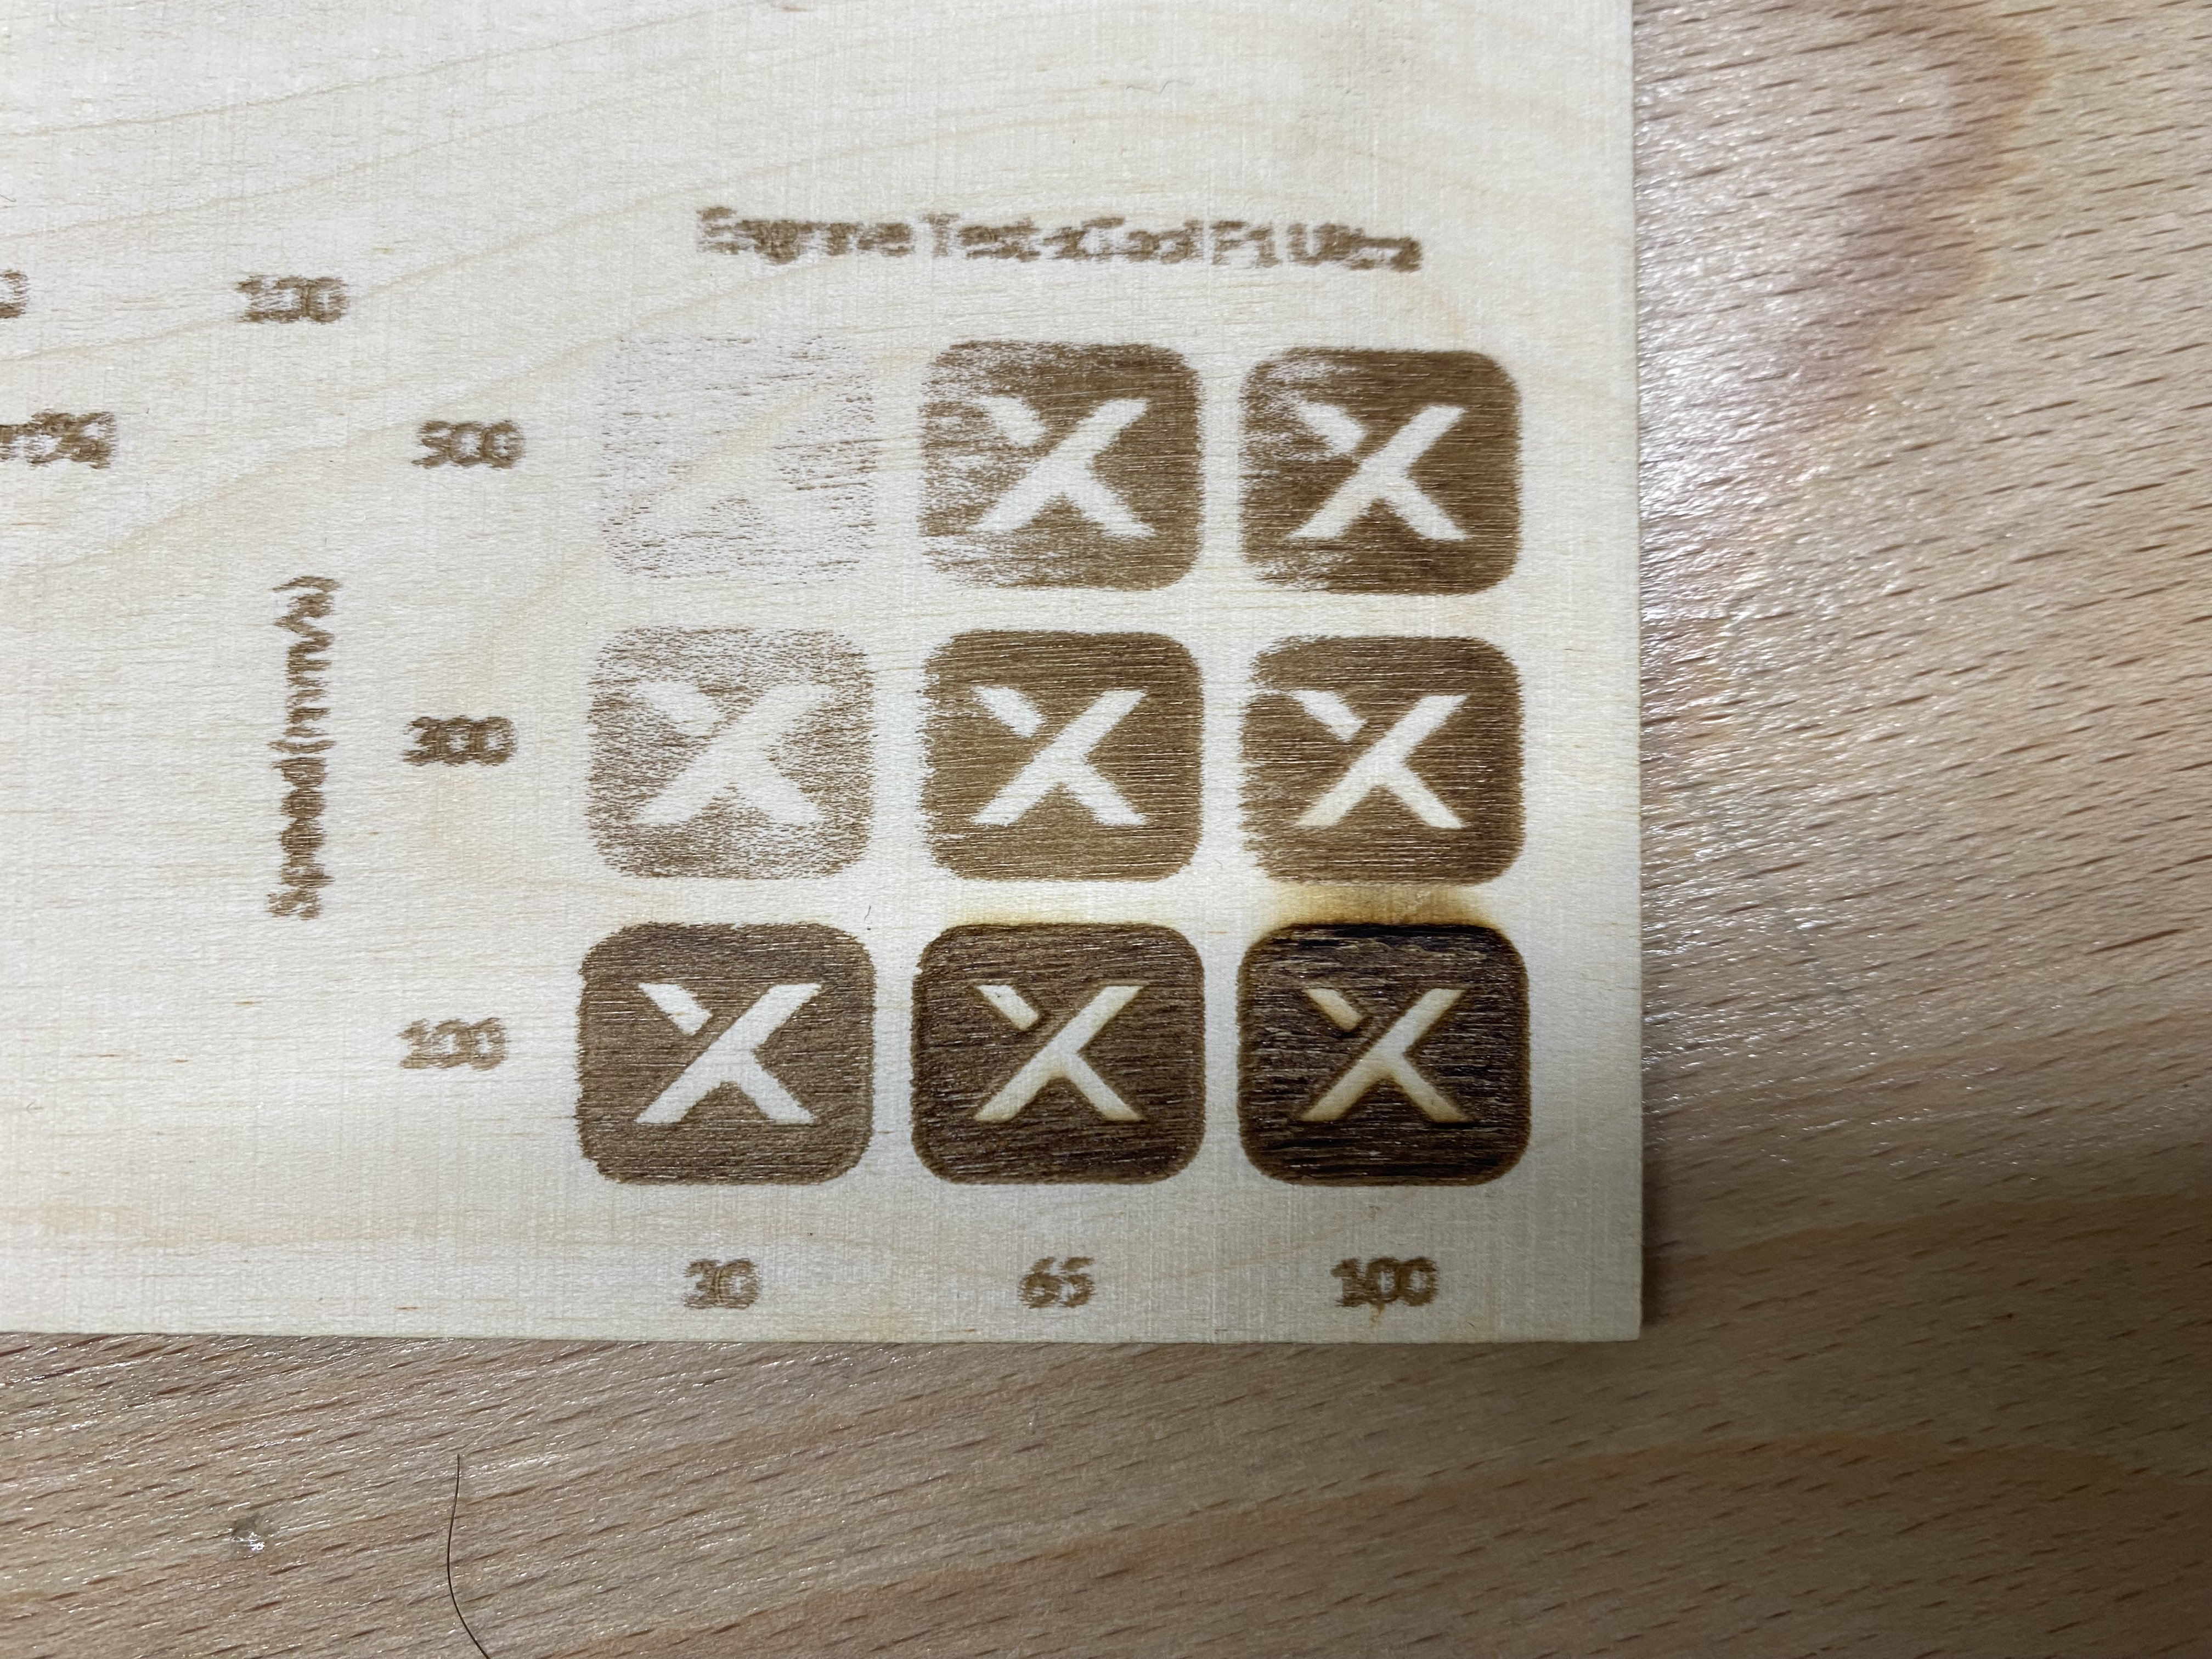
The best engraving result was achieved at 65 power and 100 speed, producing clear and consistent marking.
A cutting test was performed on the same wood material to evaluate the machine’s cutting capability.
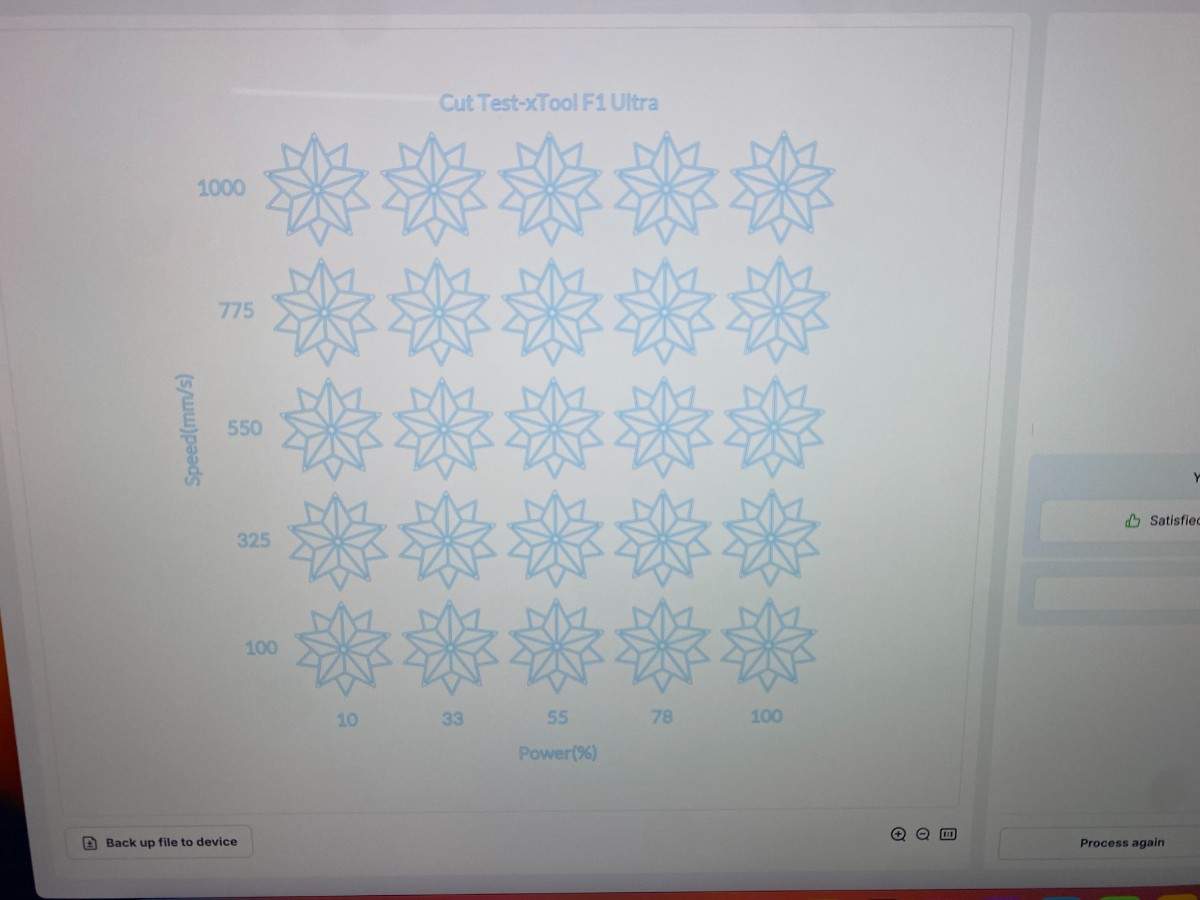
The best cutting result was achieved at 40 power and 34 speed. At 8 speed, the material burned, showing that overly slow speed causes excessive heat buildup on wood.
Wood is sensitive to heat buildup: very low speeds can cause burning.
Engraving quality was clear and consistent when correct parameters were used.
Cutting is possible, but parameter limits are tighter compared to a CO₂ laser like the P2S.
Proper supervision is critical due to thermal load and fire risk.
This section documents the group characterization of the vinyl cutting machines available in our FabLab. Unlike laser cutters, vinyl cutters remove material by slicing rather than ablation, which results in different safety considerations and characterization parameters.
For vinyl machines, the group focused on operational safety, blade handling, and material loading procedures. Instead of kerf and joint testing, we evaluated cutting force, speed, minimum feature size, material compatibility, and post-processing quality such as weeding and transfer performance. Each machine was tested using comparable designs to observe differences in precision, reliability, and ease of use.
By characterizing multiple vinyl cutters ranging from hobby-level to industrial-grade systems, we were able to compare their strengths and limitations and identify appropriate use cases for each machine, including sticker production, signage, and print-and-cut workflows.
Safety training for the Cricut Maker 3 focused on safe blade handling and proper material loading.
Although the Cricut does not pose fire risks like laser cutters, the blade and moving carriage can cause injury if handled improperly. Users were instructed to keep hands away from the blade housing while the machine is operating.
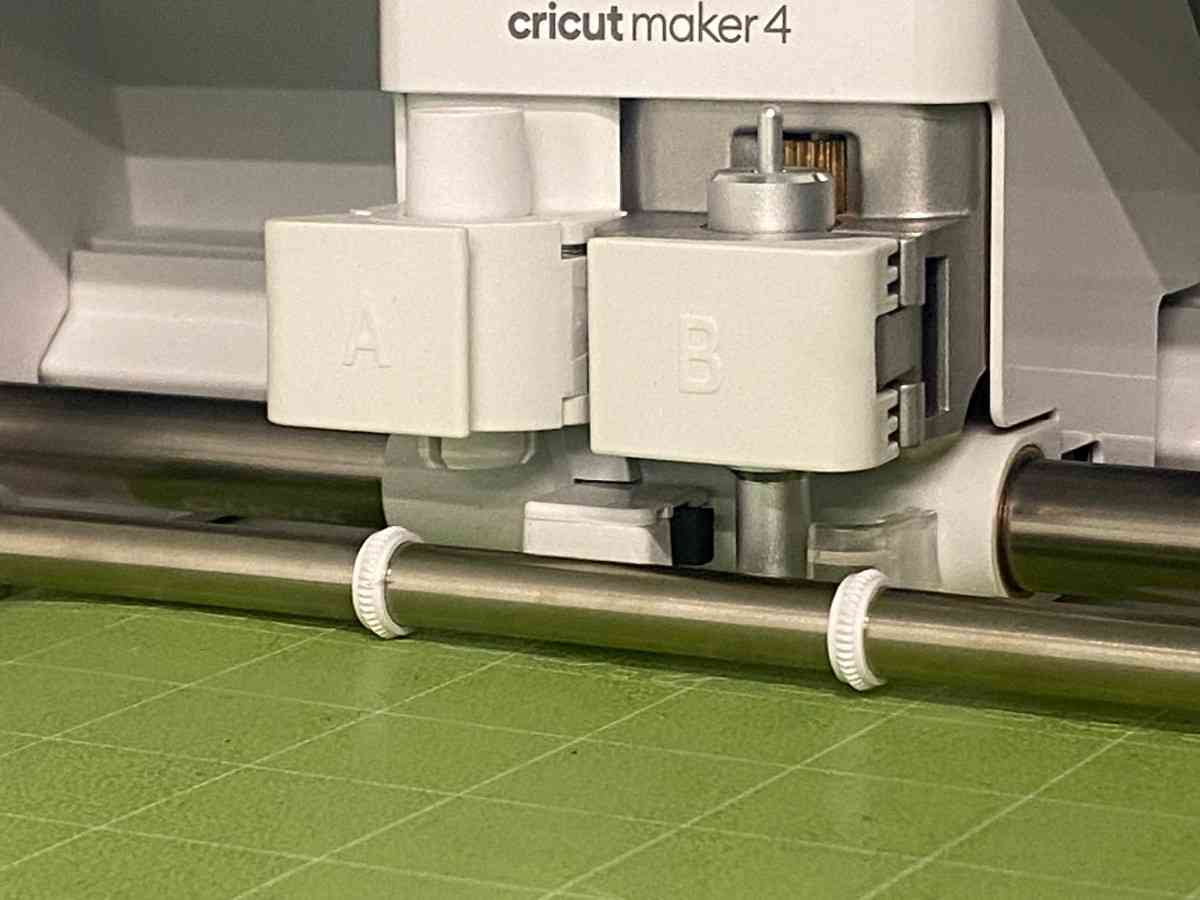
Materials were secured flat on the cutting mat, and mats were inserted straight to prevent jamming or misalignment. Blade changes were performed only when the machine was powered off.
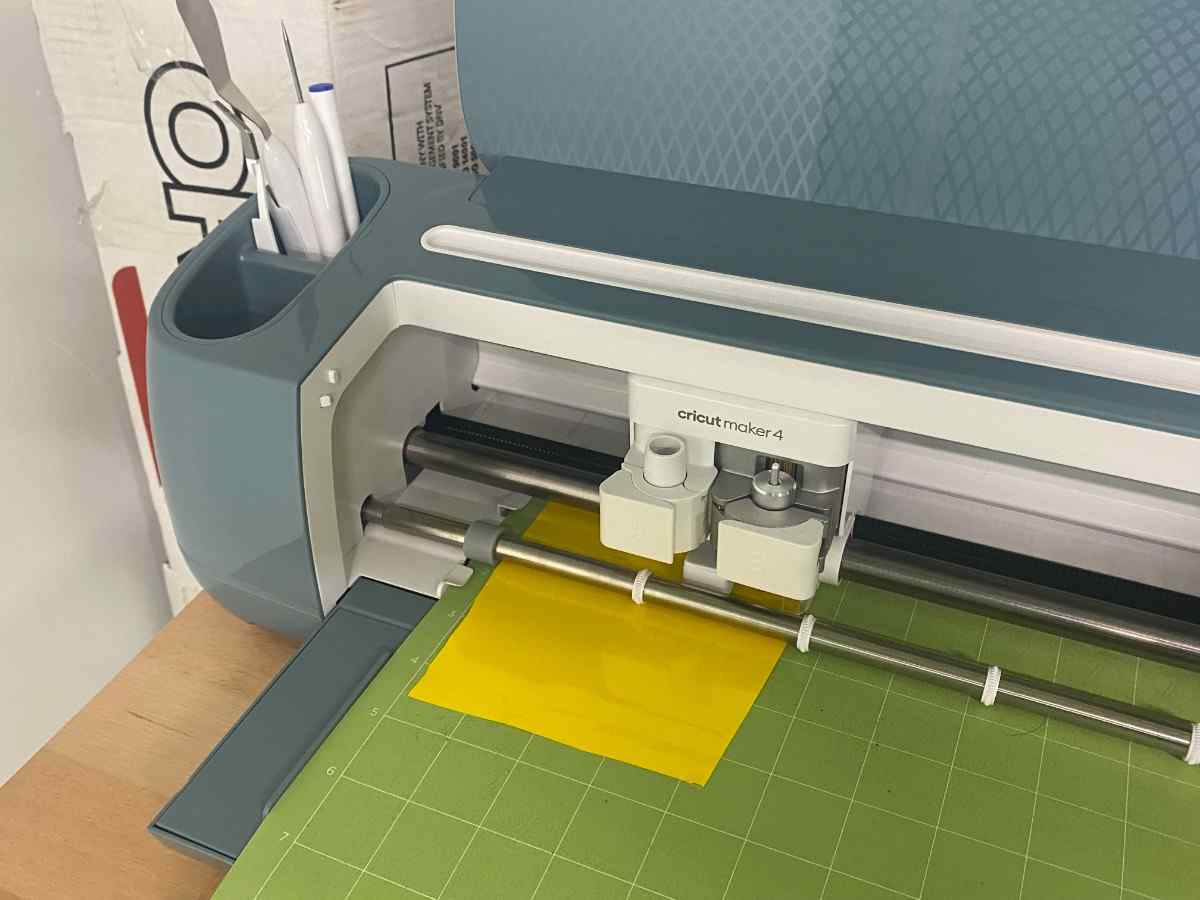
The standard fine-point blade was used for all tests. The blade was visually inspected prior to cutting and confirmed to be clean and undamaged to ensure consistent cutting performance.
Cutting force was adjusted using Cricut Design Space pressure settings (Less, Default, and More) to determine the minimum pressure required for clean cuts without cutting through the backing paper.
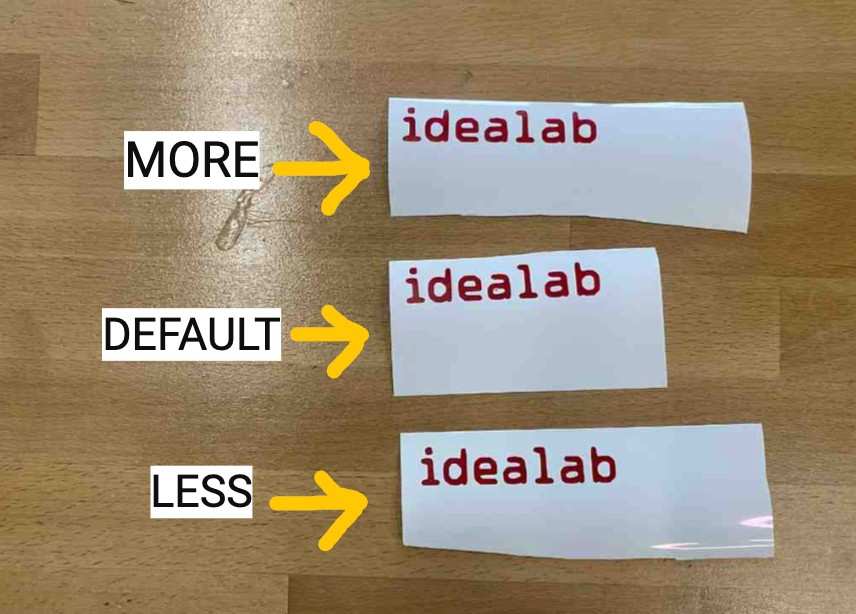
For Smart Vinyl material, all three pressure settings produced visually identical results. In each case, the vinyl layer was cut cleanly while the backing paper remained intact. This indicates that Smart Vinyl falls within the Cricut Maker 3’s default optimal cutting range, where small pressure variations do not significantly affect cut depth.
The Cricut Maker 3 does not provide direct speed control. Cutting speed is normally adjusted indirectly through different cut styles; however, Smart Vinyl materials are only compatible with the Basic Cut mode.
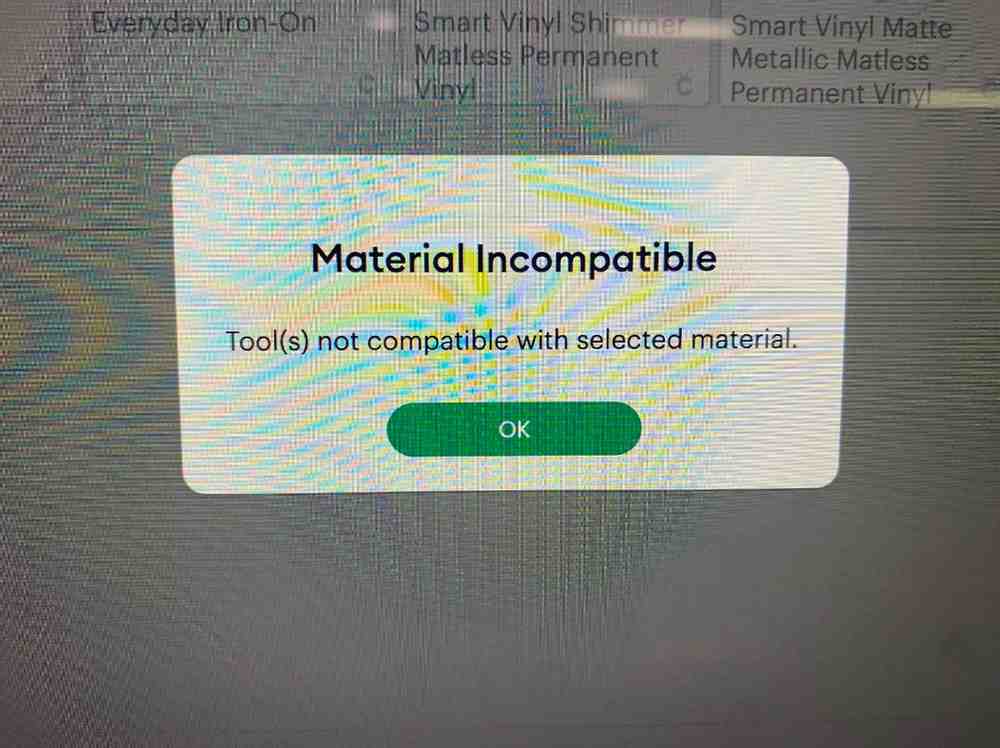
Because alternative cut styles that reduce cutting speed (such as Perforate or Wavy Cut) are not supported for Smart Vinyl, cutting speed could not be independently varied for this material and remained fixed during testing.
Minimum feature size was evaluated by cutting text at three font sizes (10, 20, and 30) using identical settings.
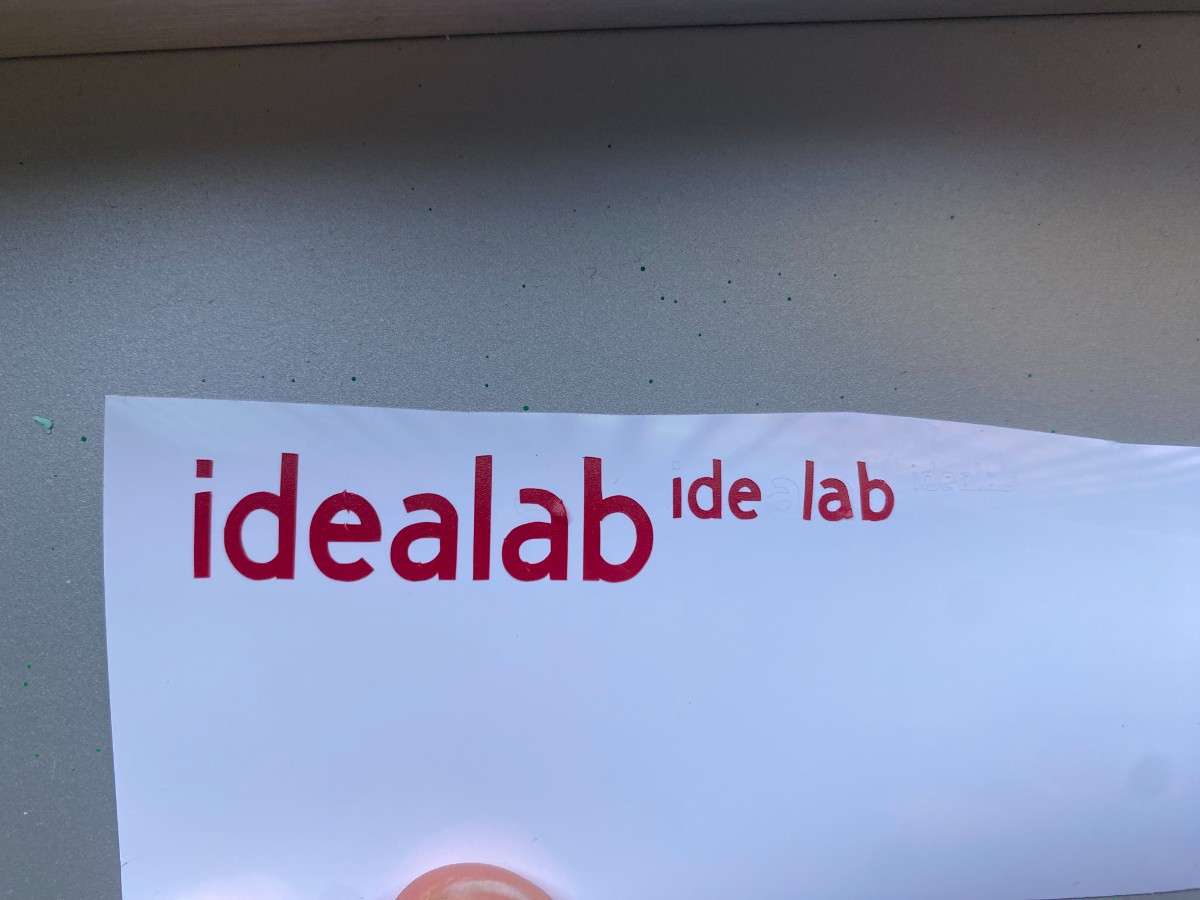
The 30-size text cut and weeded cleanly without distortion. The 20-size text partially failed during weeding, with individual letters lifting or tearing due to limited precision. The 10-size text did not cut successfully and resulted in no visible separation from the backing material. These results indicate that minimum feature size on Smart Vinyl is limited by weeding precision rather than cut depth.
Weeding quality was evaluated based on ease of removal and edge stability.
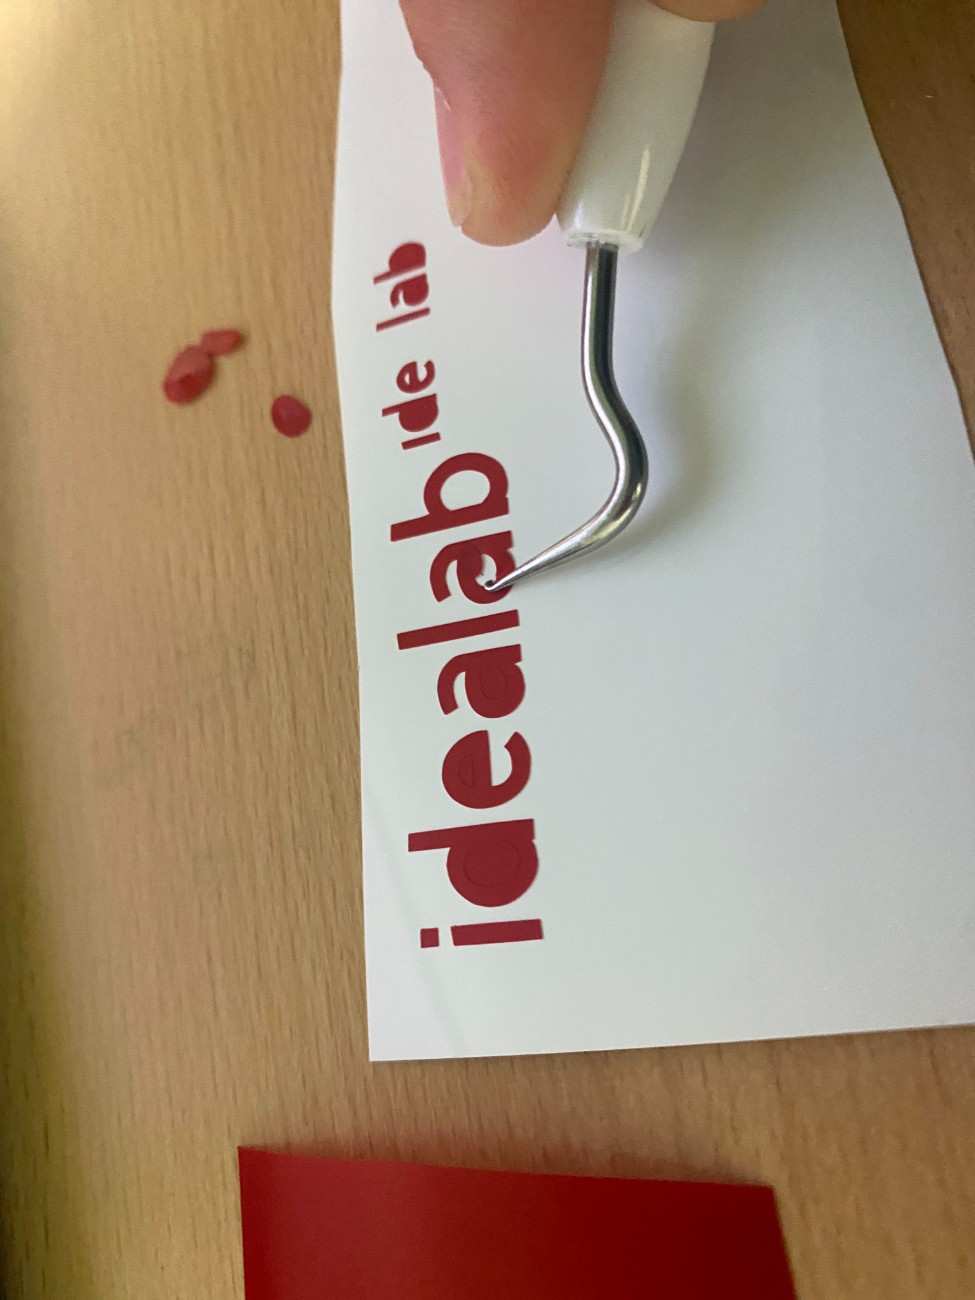
Larger features weeded cleanly with minimal effort, while smaller features were prone to lifting or tearing during removal. Clean cuts significantly reduced weeding time and improved edge quality, whereas fine details increased the risk of material distortion.
Safety training for the Roland VersaStudio GS2-24 emphasized correct vinyl roll loading, pinch roller alignment, and blade safety.
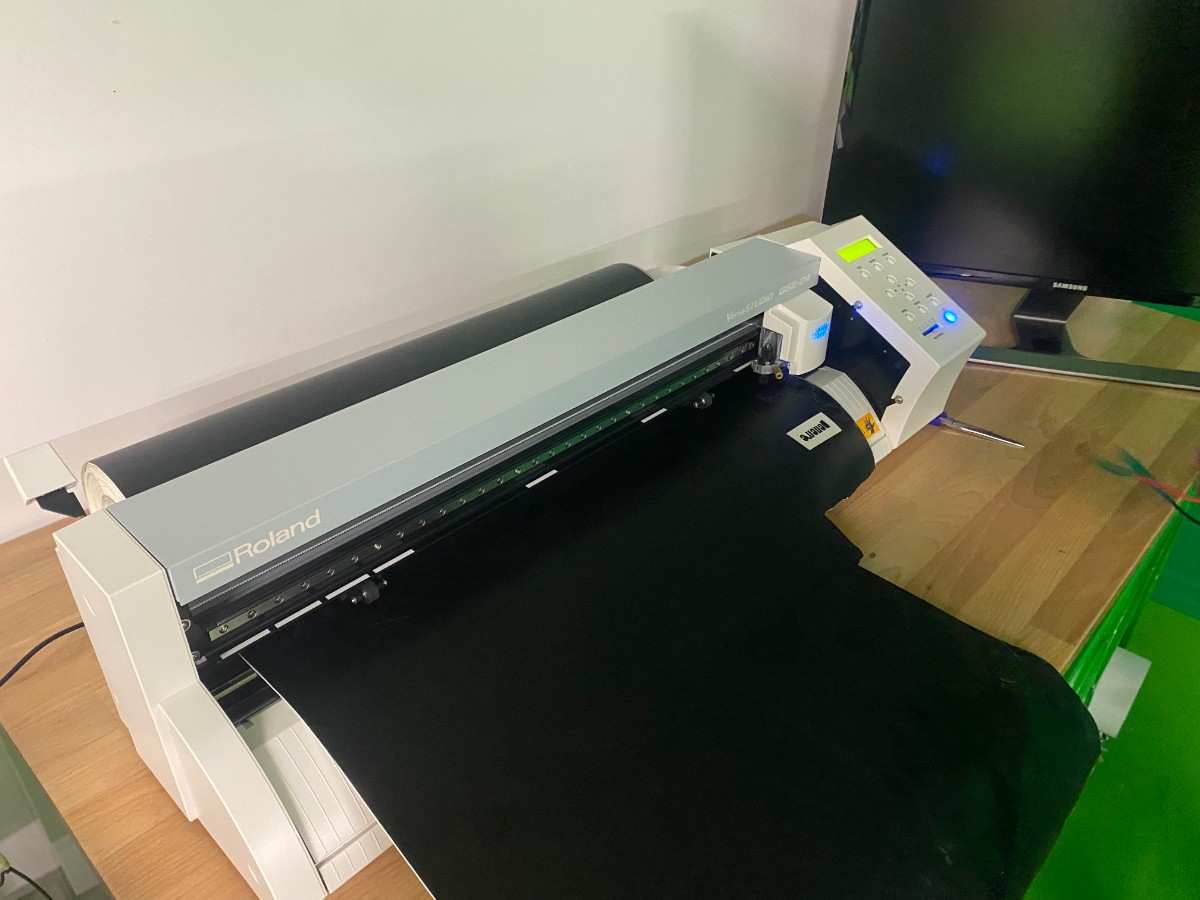
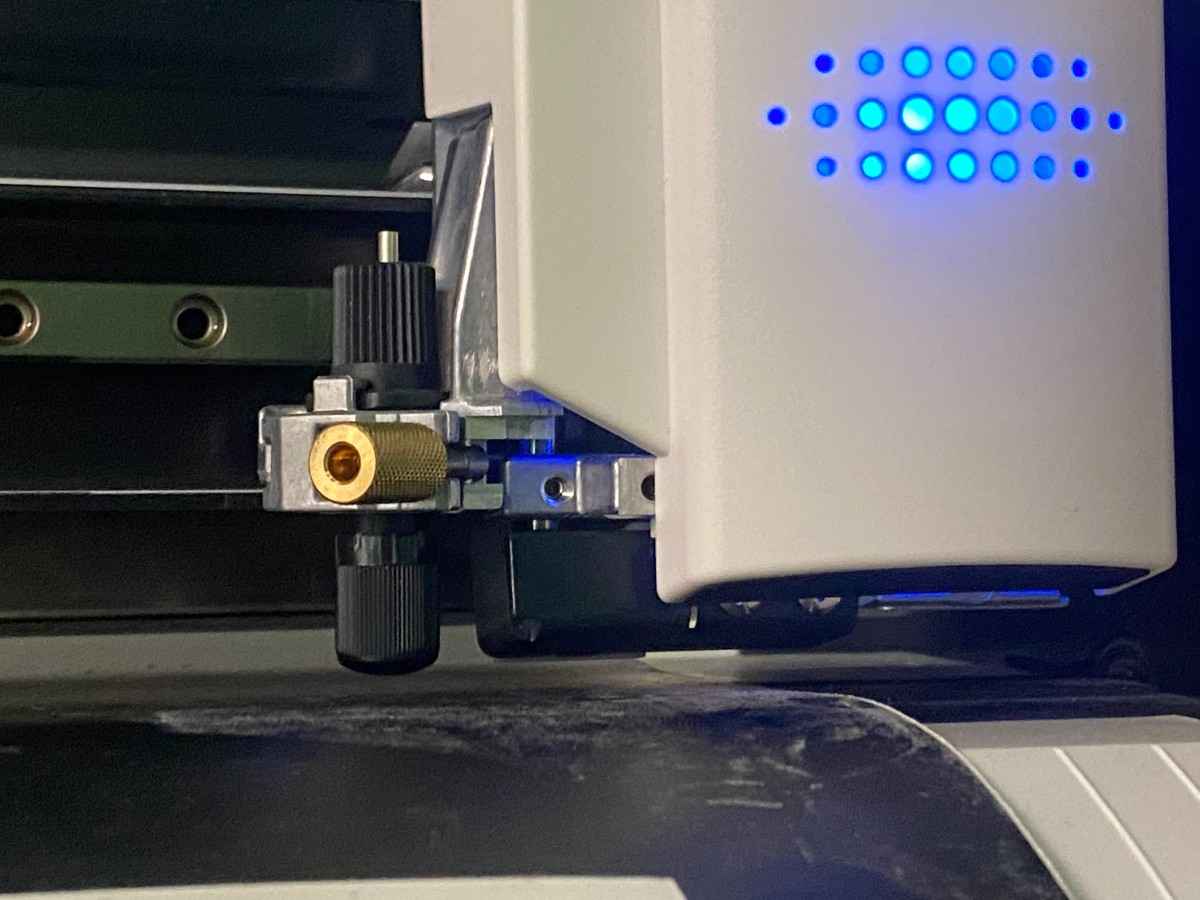
Pinch rollers were positioned correctly over the grit rollers before operation to prevent material drift. Hands were kept clear of the moving carriage, and blade force was adjusted gradually to avoid damaging the cutting strip or backing paper.
The standard Roland blade was used for all tests. Blade condition was checked prior to cutting, and blade offset was set according to manufacturer recommendations to ensure accurate cornering.
Cutting force was tested at multiple values to determine optimal penetration through the vinyl without damaging the backing paper.
70 gf
80gf
At 60 gf, the vinyl did not cut sufficiently and could not be weeded. At 70 gf, the vinyl cut cleanly and weeded successfully. At 80 gf, the cut quality improved further, allowing easier weeding and cleaner separation. Increasing force to 90 gf caused a motor error and was therefore unsuitable. Based on these results, 80 gf was identified as the optimal cutting force for this material.
Cutting speed was tested while keeping force constant at 80 gf.
20 speed
10 speed
At 10 cm/s and 20 cm/s, cut quality and edge precision were visually identical. Increasing speed to 30 cm/s resulted in a motor error and could not be used. These results indicate that within the tested range, cutting speed did not significantly affect cut quality, while excessive speed exceeded machine limits.
Small geometries were cut to determine the minimum reliably reproducible feature size.
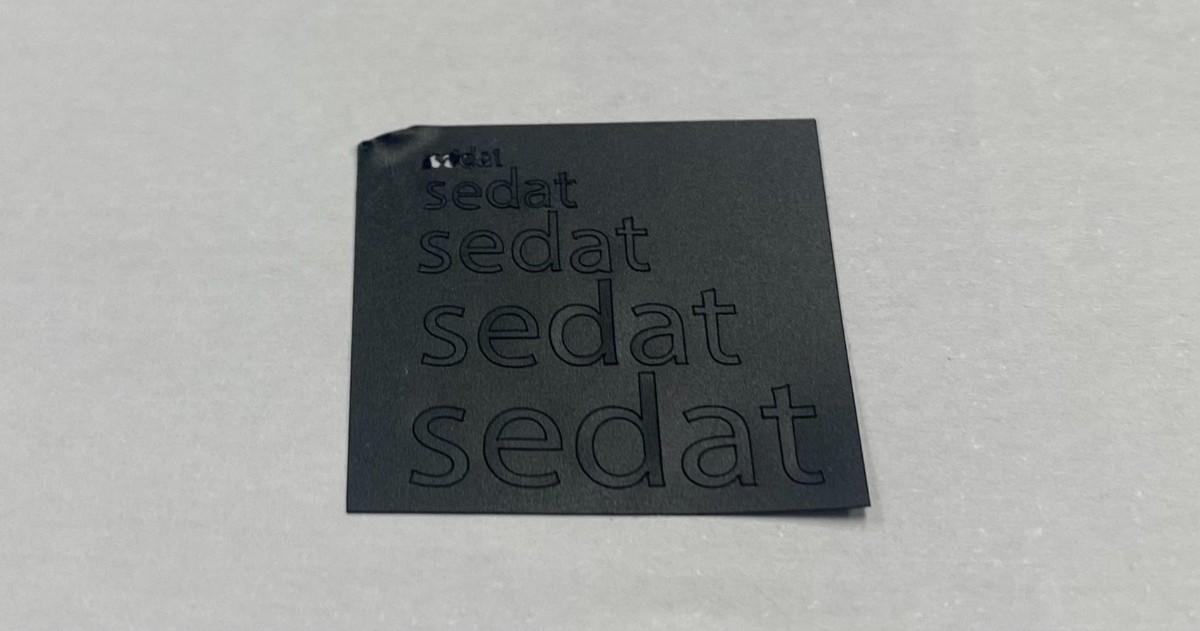
Above you can see the test cut on different fonts.
Safety training for the Roland BN-20 focused on safe operation of both the printing and contour cutting processes.
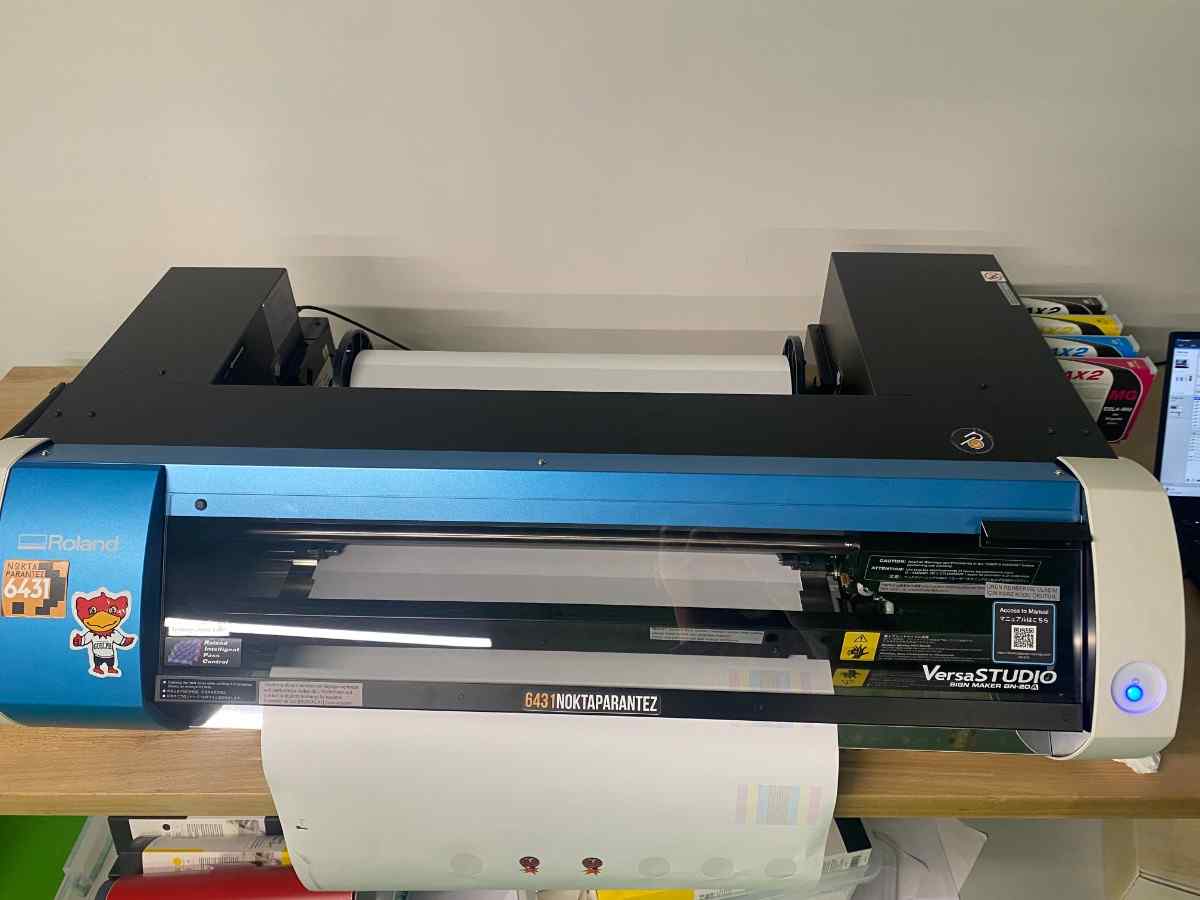
Because the BN-20 uses ink-based printing, proper ventilation was confirmed before operation to reduce exposure to ink fumes. Users were instructed not to touch the print head or ink cartridges while the machine was powered on.
Two Fab Academy sticker designs were prepared using the BN-20 print-and-cut workflow.
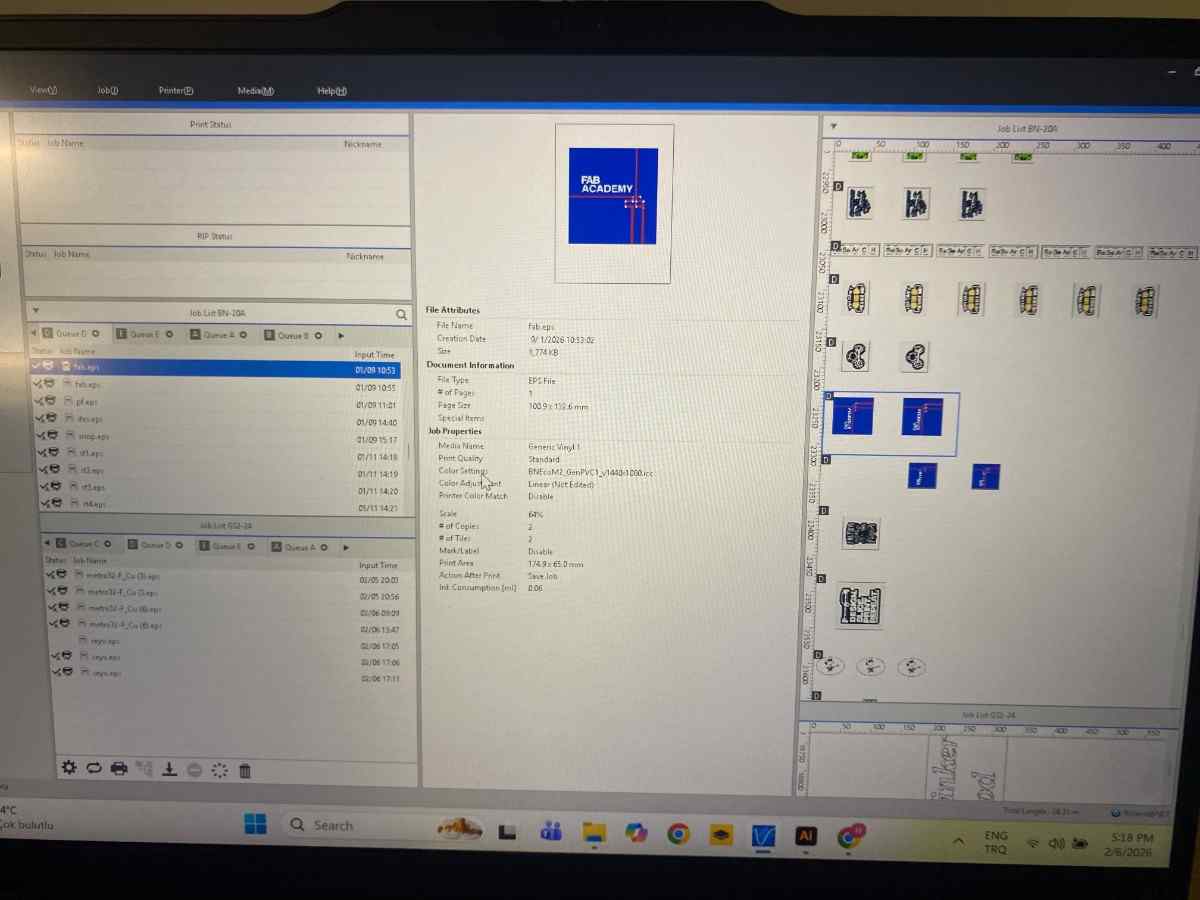
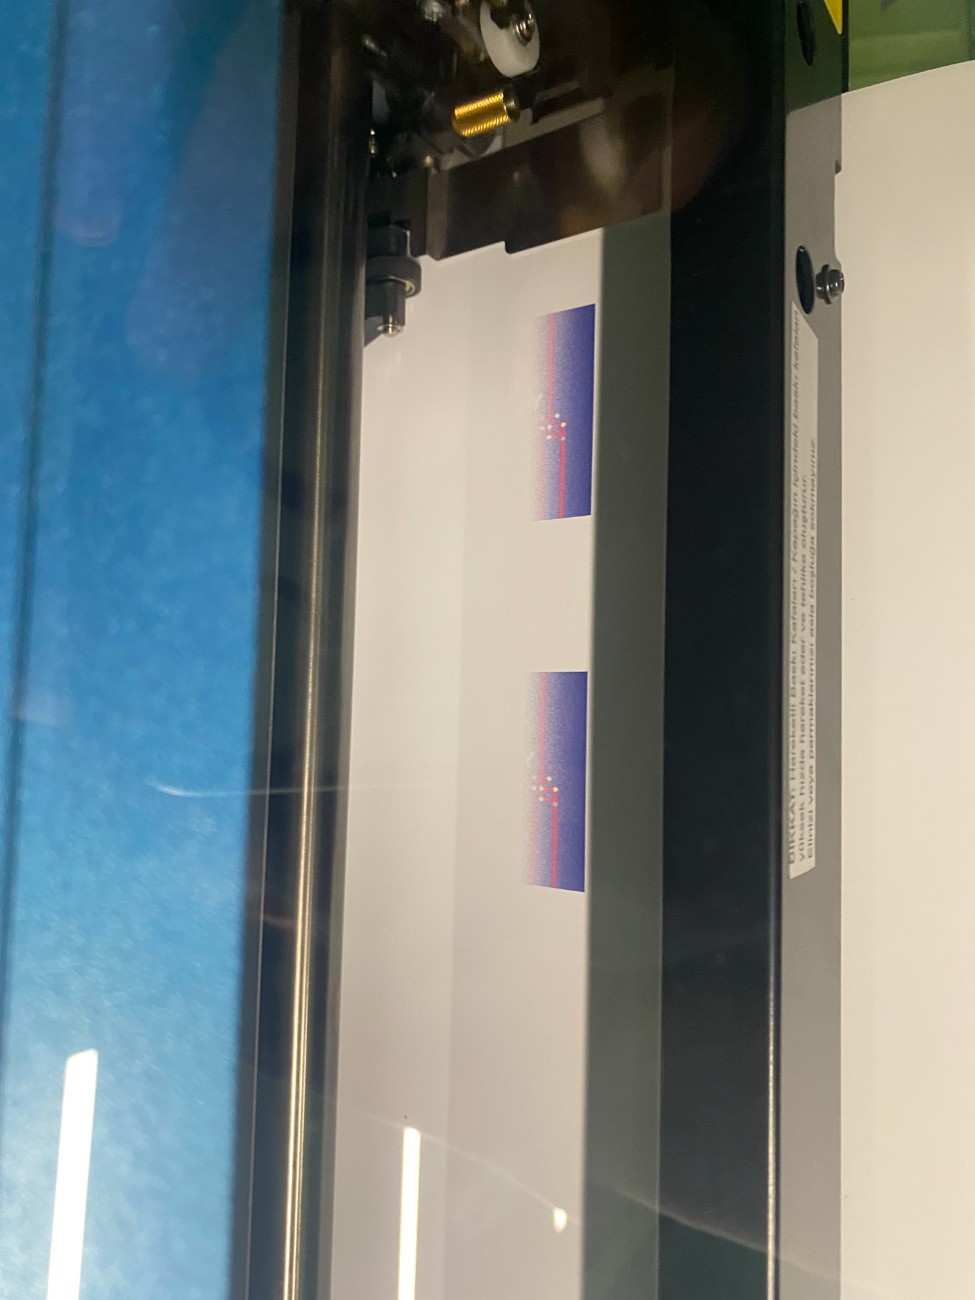
The designs included printed graphics intended for contour cutting. Registration marks were automatically generated by the software to enable accurate alignment between the printed image and cutting path.
The printing process was initiated after verifying material compatibility and print settings.
The machine printed the designs directly onto adhesive vinyl. After printing, the material was left to dry before proceeding to contour cutting to prevent ink smearing and alignment issues.
Once printing was complete and the ink had dried, the BN-20 performed optical registration to align the cutting path with the printed graphics.
The print-and-cut process was not interrupted once started to avoid registration errors or wasted material.
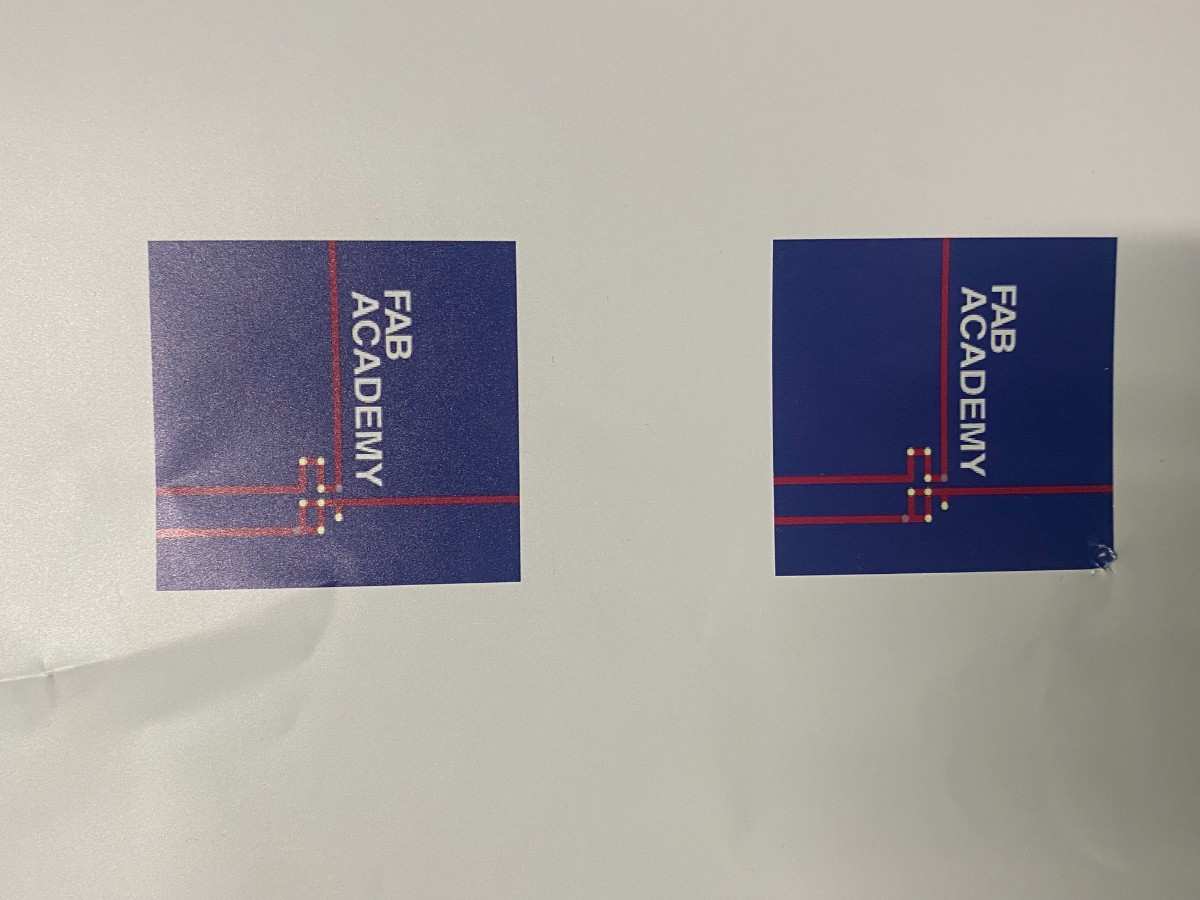
Both Fab Academy stickers were produced successfully with clean edges and accurate alignment between the printed graphics and contour cuts. No visible registration errors or edge lifting were observed, indicating that the BN-20 is well-suited for high-quality sticker production.
| Machine | Primary Use | Focus Control | Kerf Relevant | Joint Fabrication |
|---|---|---|---|---|
| xTool P2S | Cutting + Engraving | Automatic | Yes | Yes |
| Epilog | Cutting + Engraving | Manual | Yes | Yes |
| xTool F1 Ultra | Engraving | Fixed | No | No |
| Cricut Maker 3 | Vinyl cutting | N/A | No | No |
| Roland GS2-24 | Vinyl cutting | N/A | No | No |
| Roland BN-20 | Print & Cut | N/A | No | No |
We have an xTool P3, xTool F2 Ultra and MetalFab machine but they are not operational currently due to material shortage.
In this group assignment, we characterized all laser and vinyl cutting machines in our FabLab by focusing on safety, workflow, and fabrication limits. For laser cutters, we tested focus behavior, power–speed combinations, cutting rate, kerf, and press-fit joint clearance, observing that even machines using the same laser type can produce different results due to optics, focusing methods, and software workflows. Camera-assisted systems simplified setup, while manual focusing required greater operator attention but offered consistent results once calibrated.
For vinyl cutters, characterization focused on blade handling, cutting force, speed, and post-processing quality rather than kerf or joints, since vinyl cutting slices material instead of removing width. Overall, this process emphasized the importance of measuring and testing machine behavior rather than relying on default settings, enabling informed machine and parameter selection for future fabrication tasks.